Azure DevOps provides pipelines for both Continuous Integration (CI) and Continuous Delivery (CD). It also provides Git based Repos to store source files (in our case ARM templates) and version control them.
In this post I will create a Build Pipeline (also known called as a “Classic” build pipeline) to validate the ARM template and create an Artifact.
Then in a follow up post I will create a Release Pipeline (CD) to deploy the ARM template based on the Artifact created in this Build Pipeline (CI).
There are lots of ways of working with Pipelines in Azure DevOps (ADO). This is one way of doing it.
Another way is skip the build pipeline all together and go straight to release without creating an Artifact, or use the newer YAML based pipeline which allows your pipeline itself to be stored as code rather than using a GUI (aka Classic editor).
Prerequisites:
- An Azure subscription
- An Azure DevOps organisation, project and service connection to the subscription
- An ARM template in the Repo (such as this one to create a storage account https://github.com/Azure/azure-quickstart-templates/tree/master/quickstarts/microsoft.storage/storage-account-create)
Azure DevOps
Login to your Azure DevOps (ADO) organisation https://dev.azure.com
Select an existing project or create a new one (e.g. “ARM Lab”).

Azure Repos
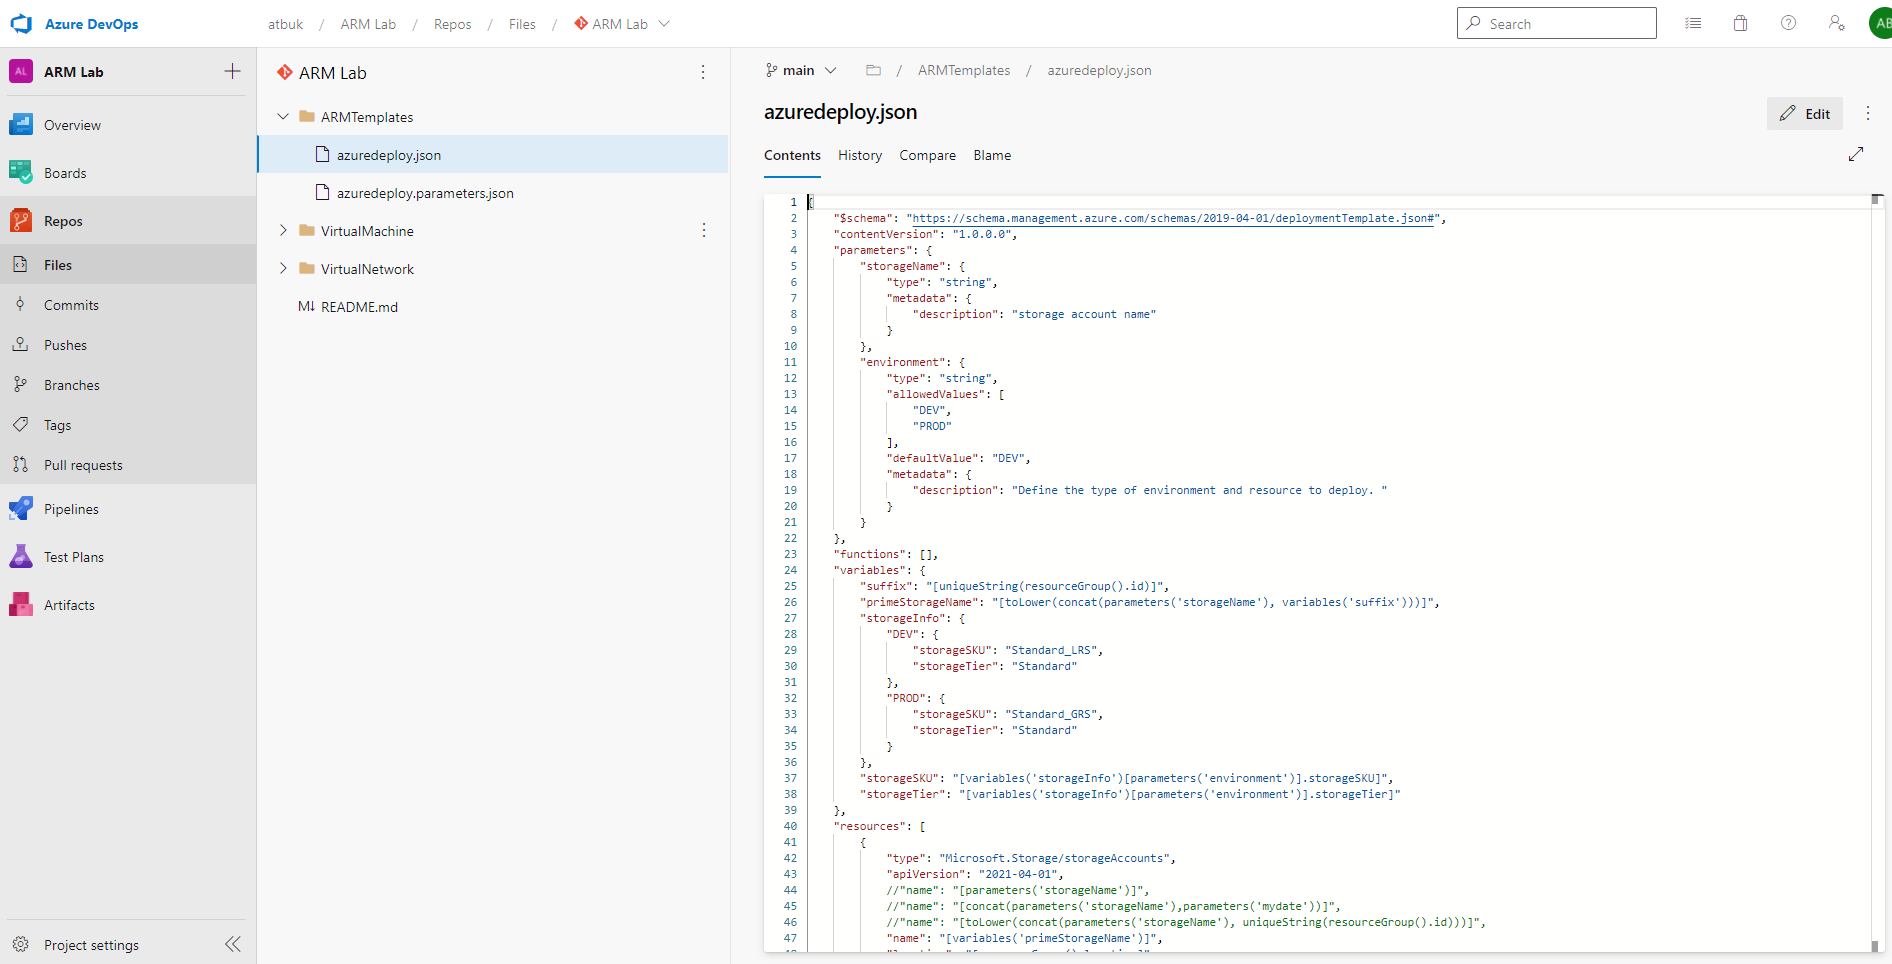
Navigate to the Repo within the project.
Create a folder called “ARMTemplates”.
Upload your ARM template (e.g. azuredeploy.json) and parameter file (e.g. azuredeploy.parameters.json) to the Repo.
If you don’t already have an ARM template you can use this one from the Azure quickstart GitHub repo: https://github.com/Azure/azure-quickstart-templates/tree/master/quickstarts/microsoft.storage/storage-account-create
Azure Pipelines (Build Pipeline)
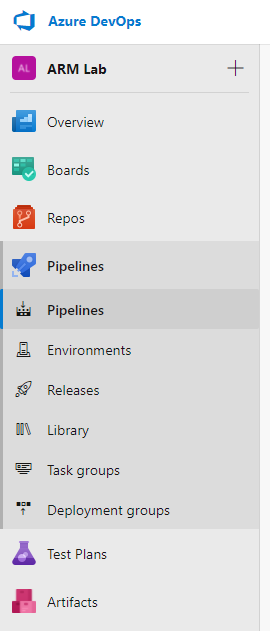
Navigate to Pipelines –> Pipelines.
This is where a Build Pipeline (Classic) is created, or a new YAML pipeline. It used to be labelled as Build Pipeline.
Click “New pipeline”.

Select “Use the classic editor”. This will create a build pipeline using the GUI.
If you selected anything else you will have ended up creating a YAML pipeline which is not the scope of this post. Please go back and select “Use the classic editor”.
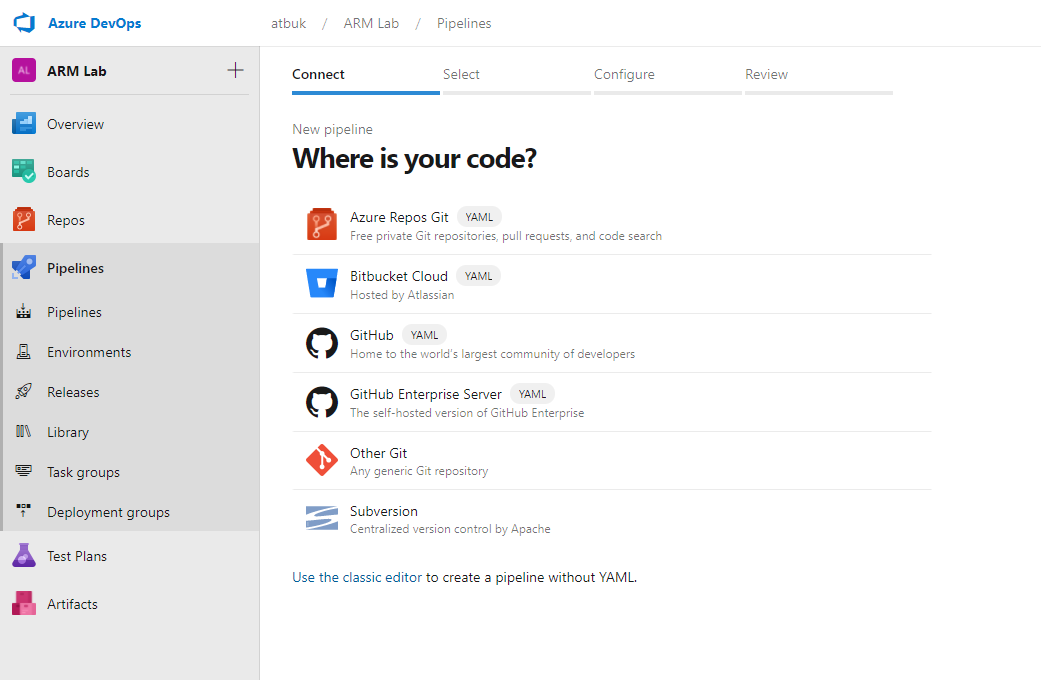
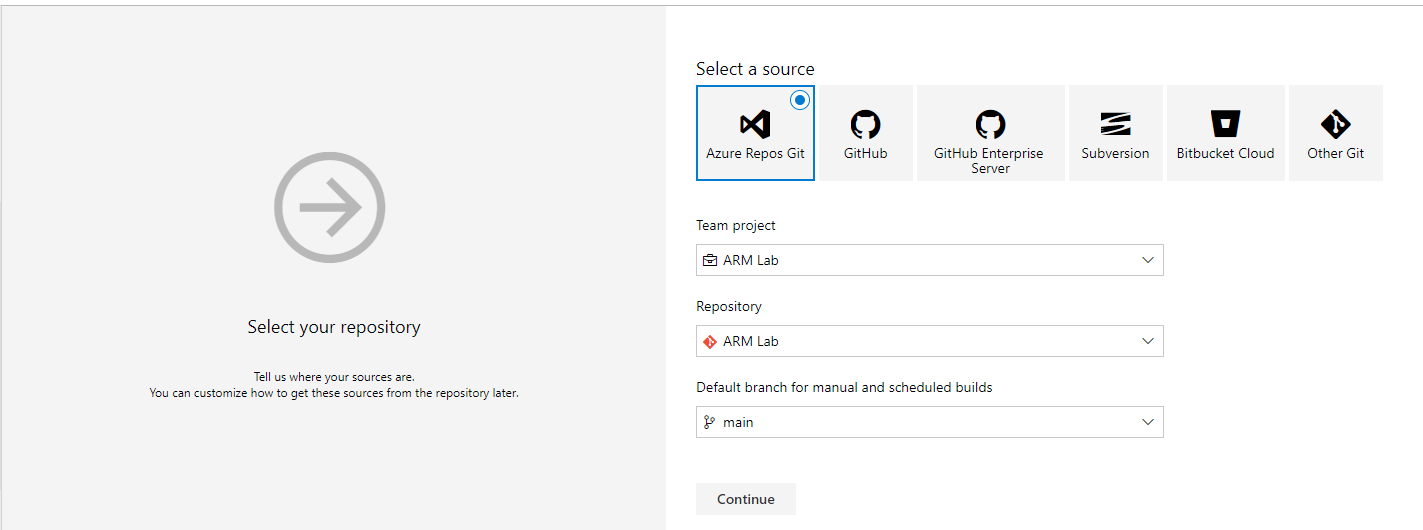
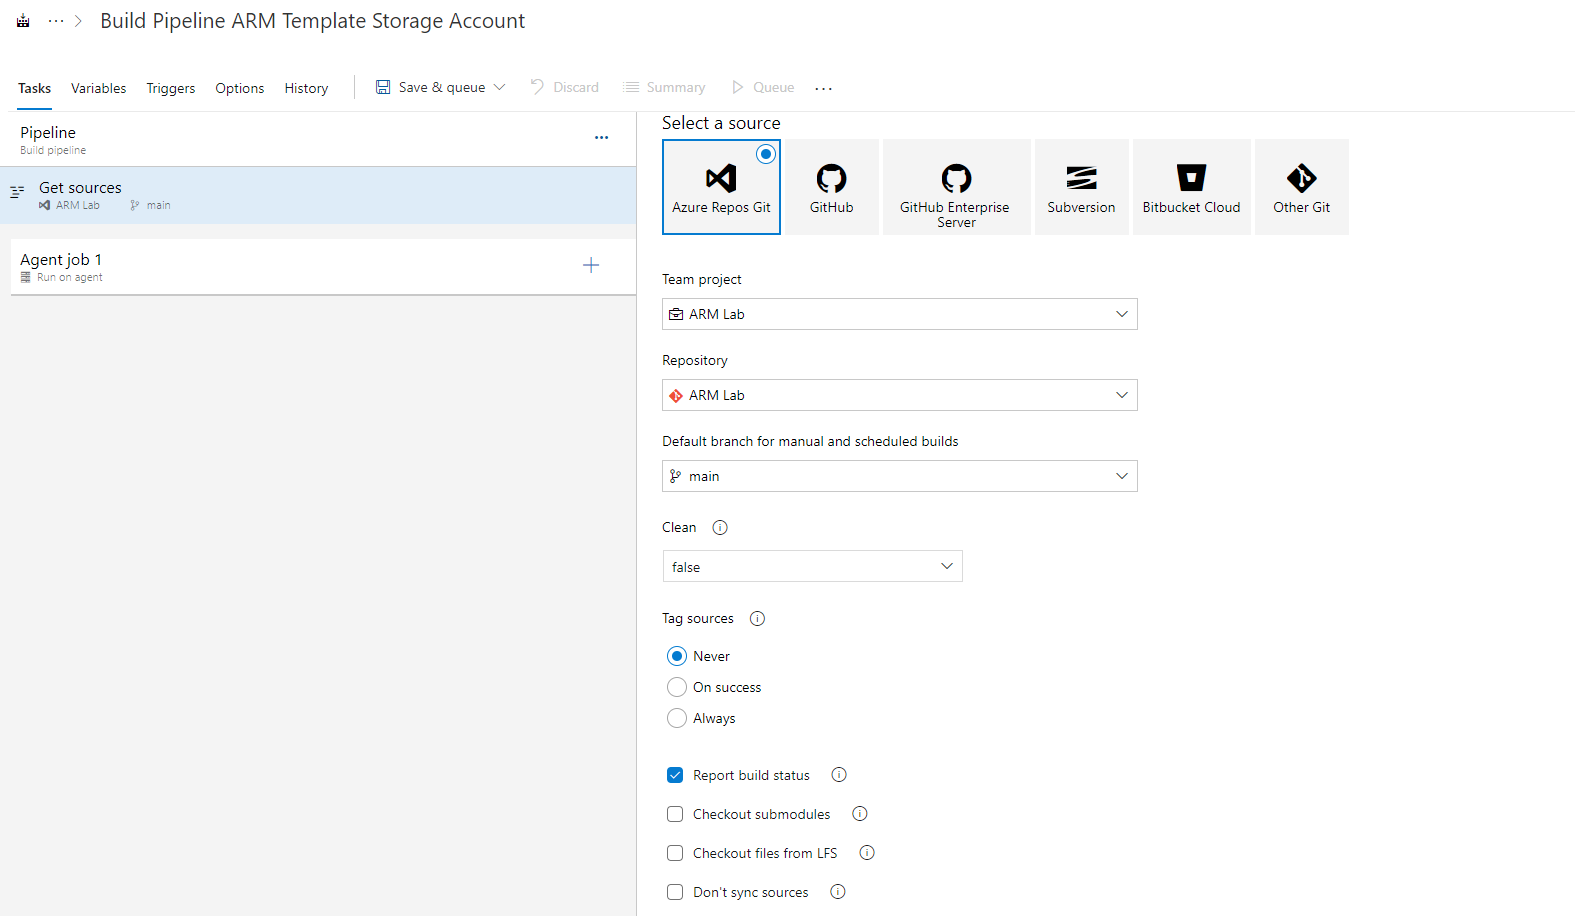
Now we have to select where our code is located, choose “Azure Repos Git”.
Select the appropriate project, repository and default branch (e.g. main) and click Continue.
Choose “Empty pipeline” when provided with the template options below.

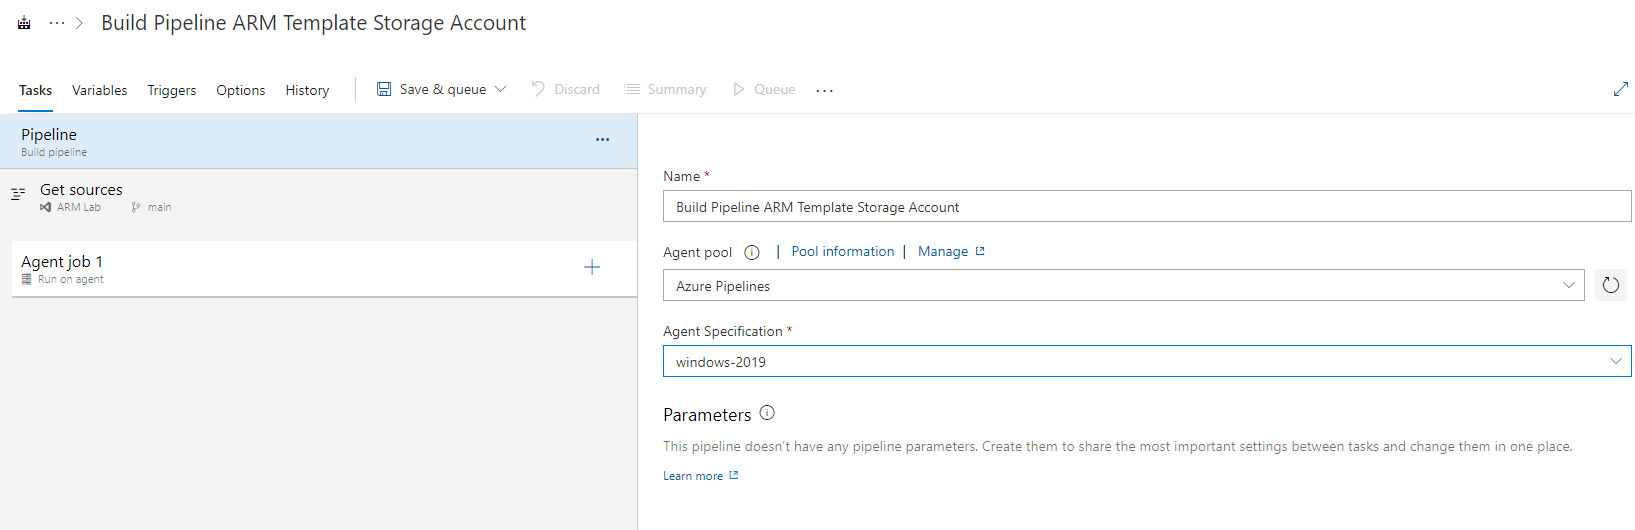
Give your pipeline a name, such as “Build Pipeline ARM Template Storage Account”, that seems to explain it well enough, but by all means call yours “Test Pipeline 1” if you wish 🙂
Leave the “Azure Pipelines” agent pool selected which will use the Microsoft hosted ADO agents.
For Agent Specification choose “windows-2019”
Note: There is a free tier for Microsoft hosted agents which allows 1 free parallel job. You may need to request access and details can be found here: https://docs.microsoft.com/en-us/azure/devops/pipelines/licensing/concurrent-jobs?view=azure-devops&tabs=ms-hosted
Select “Get Sources” under the Pipeline, ensure the settings are correct from what you specified earlier.
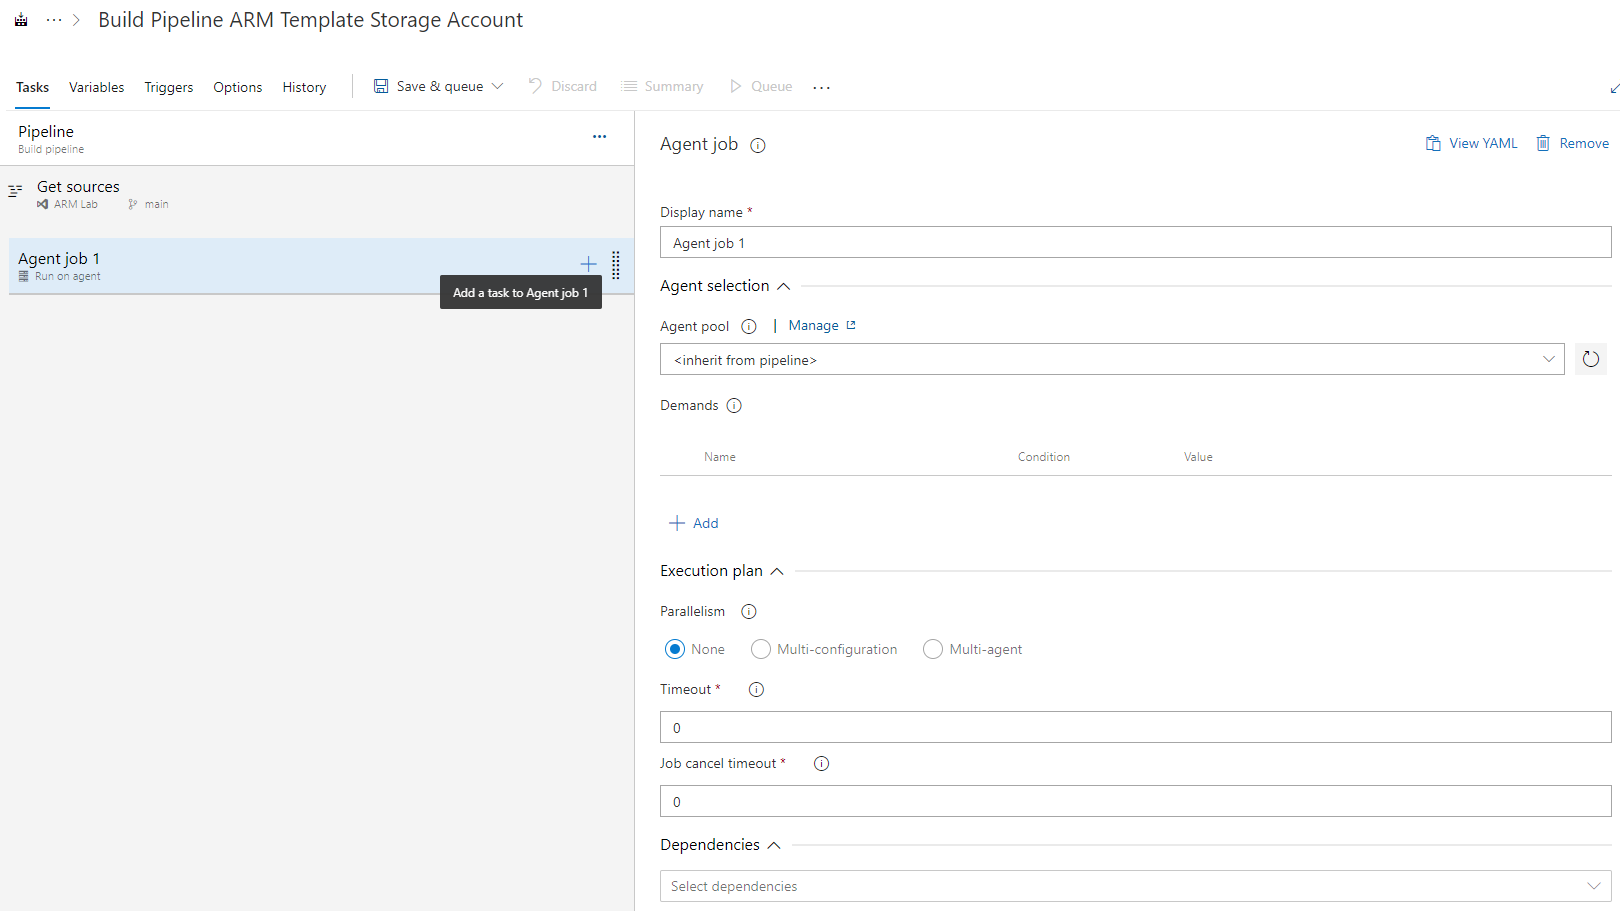
Click on “Agent job 1”, there is nothing to configure where specifically in our case, but here you can how parallel jobs run and timeouts.
Click on “+” next to “Agent job1”, this where we add tasks.
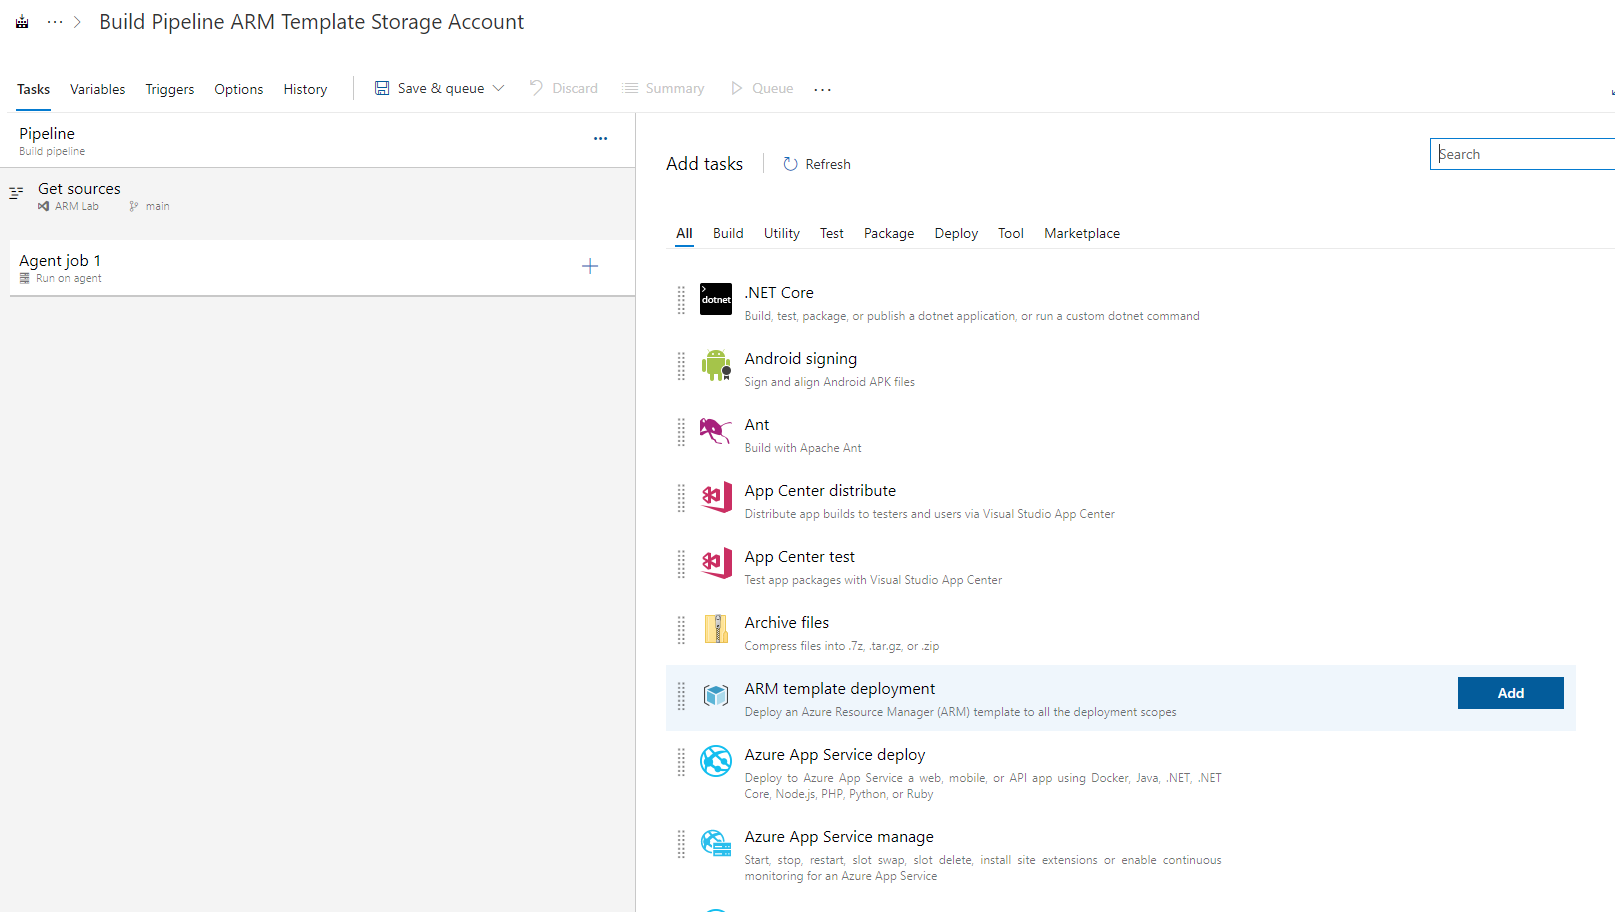
A number of different types of tasks will be listed to choose from. These cover everything to deploying and testing code, specific service deployments in Azure, or as in our case ARM template deployment. You can even search a market place of tasks and deploy to other public and private clouds such as AWS and VMware.
Select “ARM template deployment” and click “Add”.
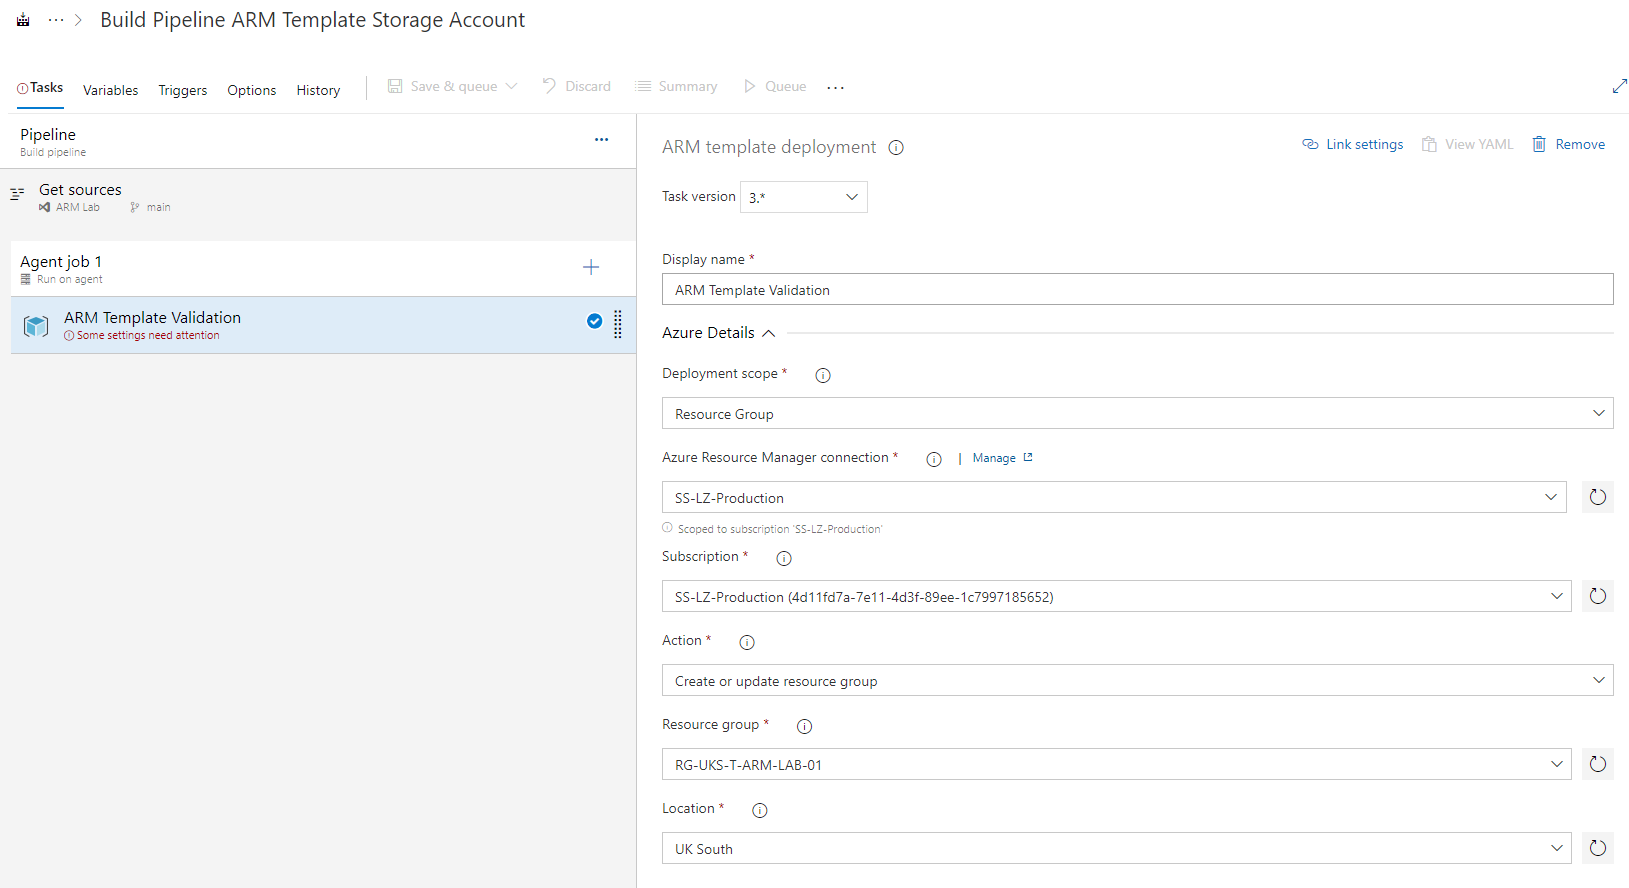
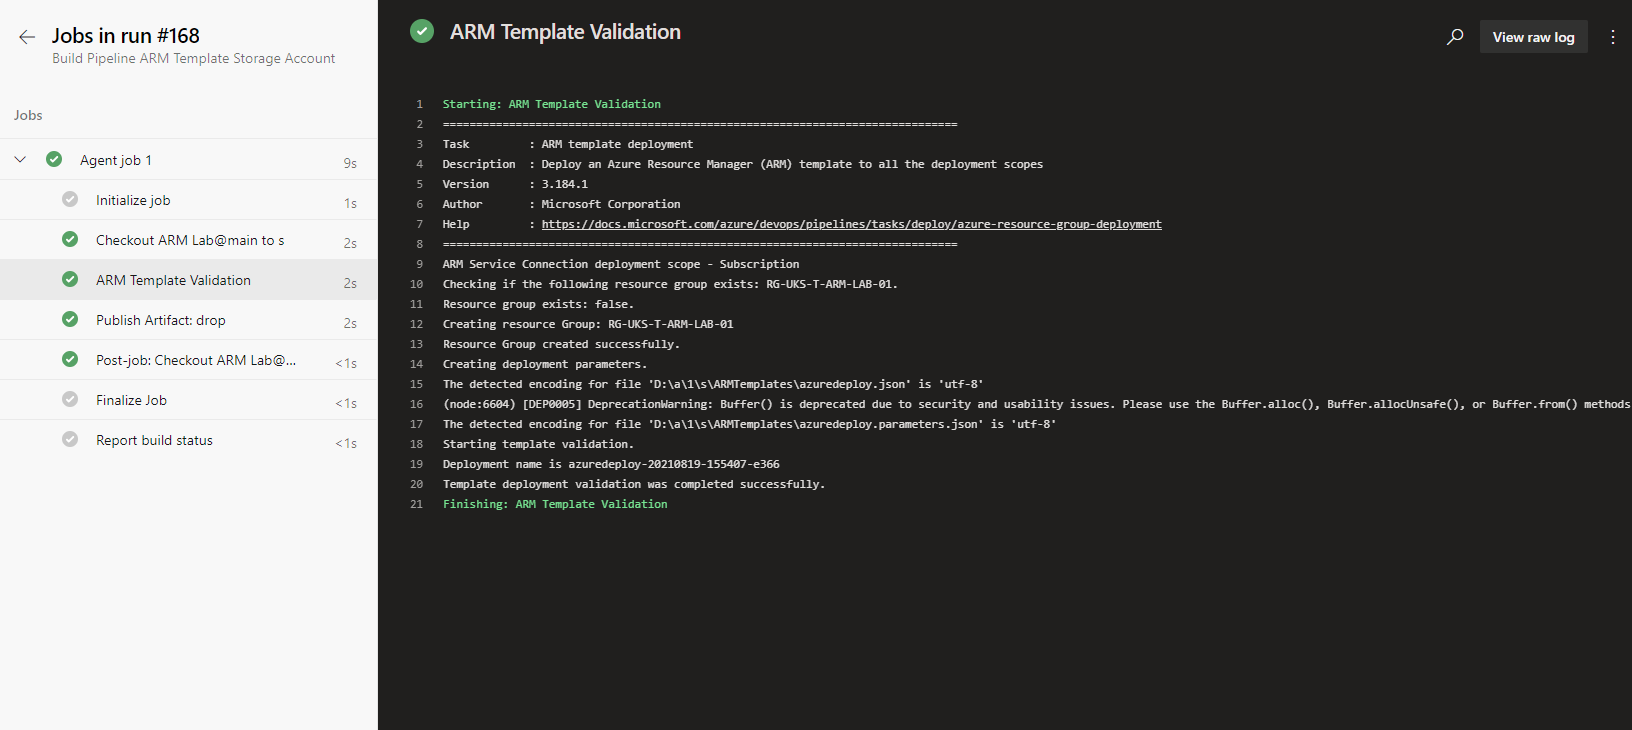
Change the task name to “ARM Template Validation”. Because in our case this is a build pipeline and we are only going to check the template is valid. We will deploy it in a Release Pipeline later.
Configure the following settings as required:
- Deployment Scope: Resource Group
- Azure Resource Manager connection: <this should have been setup when the project was created>
- Subscription: <your subscription to deploy to>
- Action: Create or update resource group
- Resource Group: e.g. RG-UKS-T-ARM-LAB-01
- Location: UK South
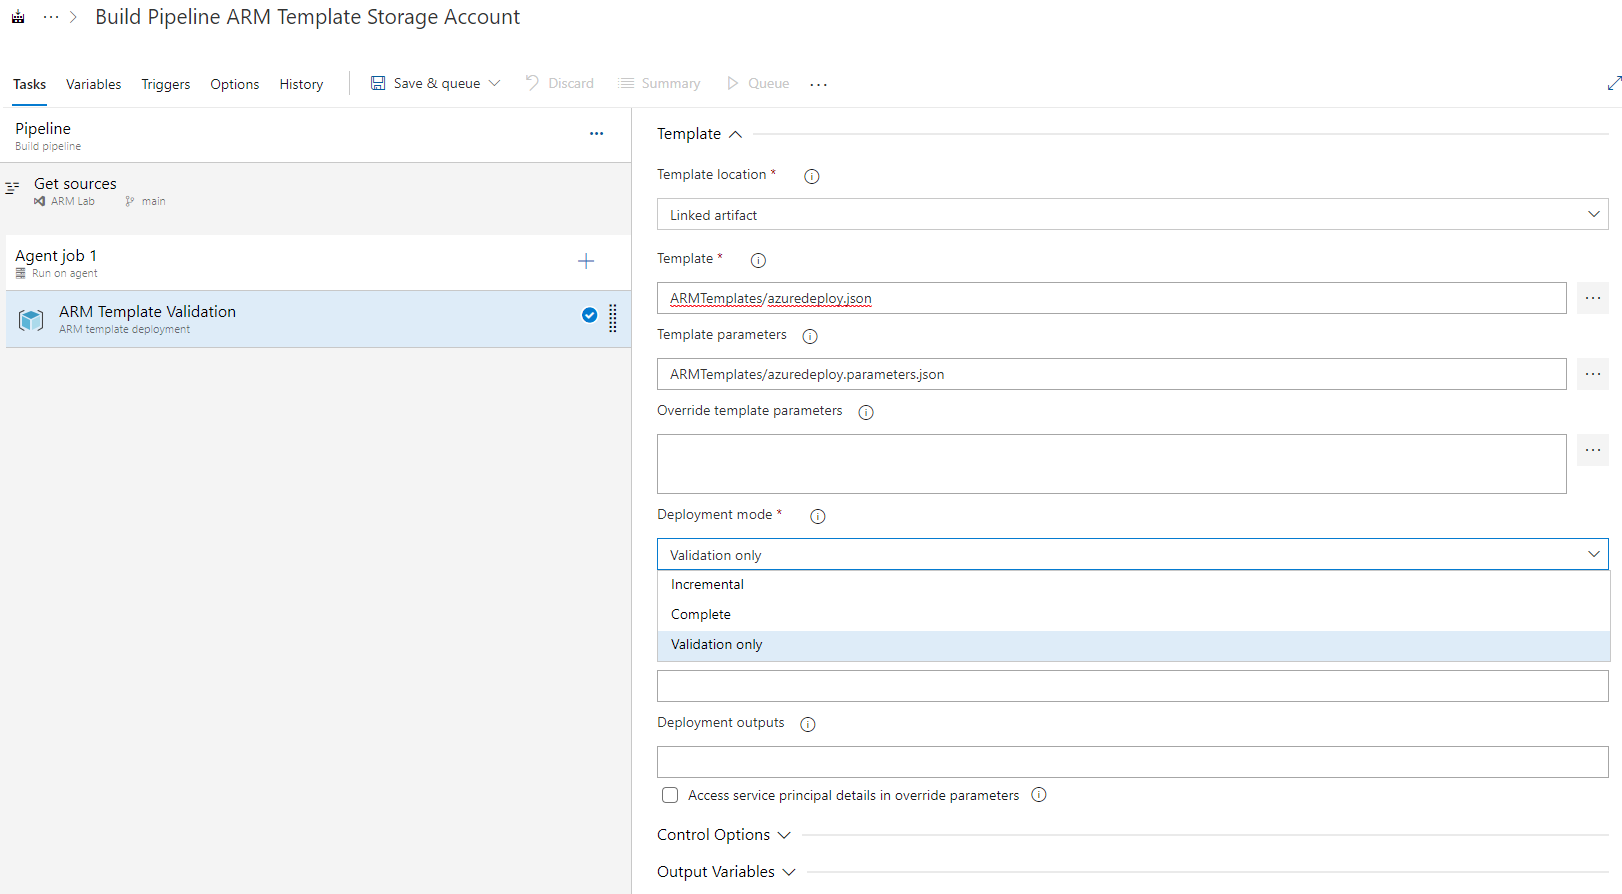
- Template Location: Linked Artifact
- Template: ARMTemplates/azuredeploy.json
- Template Parameters: ARMTemplates/azuredeploy.parameters.json
- Deployment Mode: Validation Only

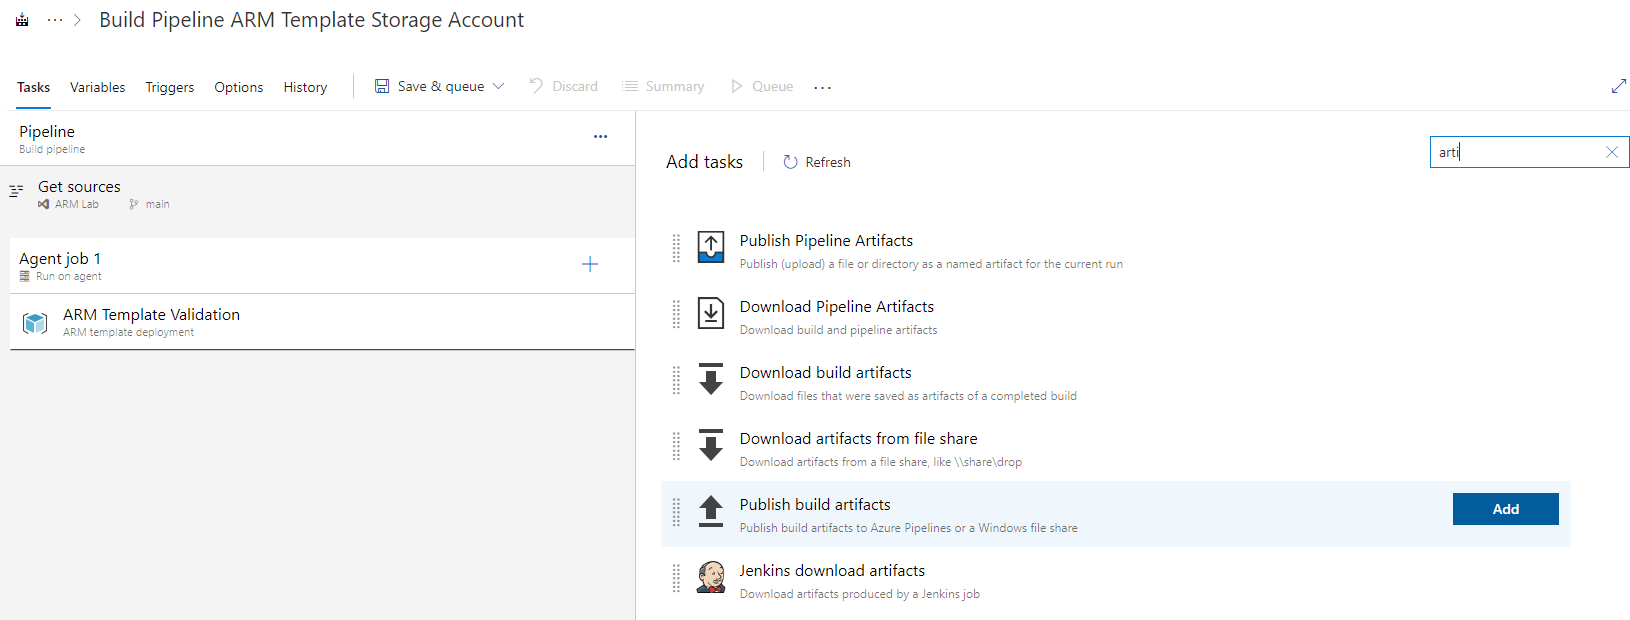
Click on “+” next to “Agent job1” again to add another task.
Select “Publish build artifacts” this time and click “Add”.
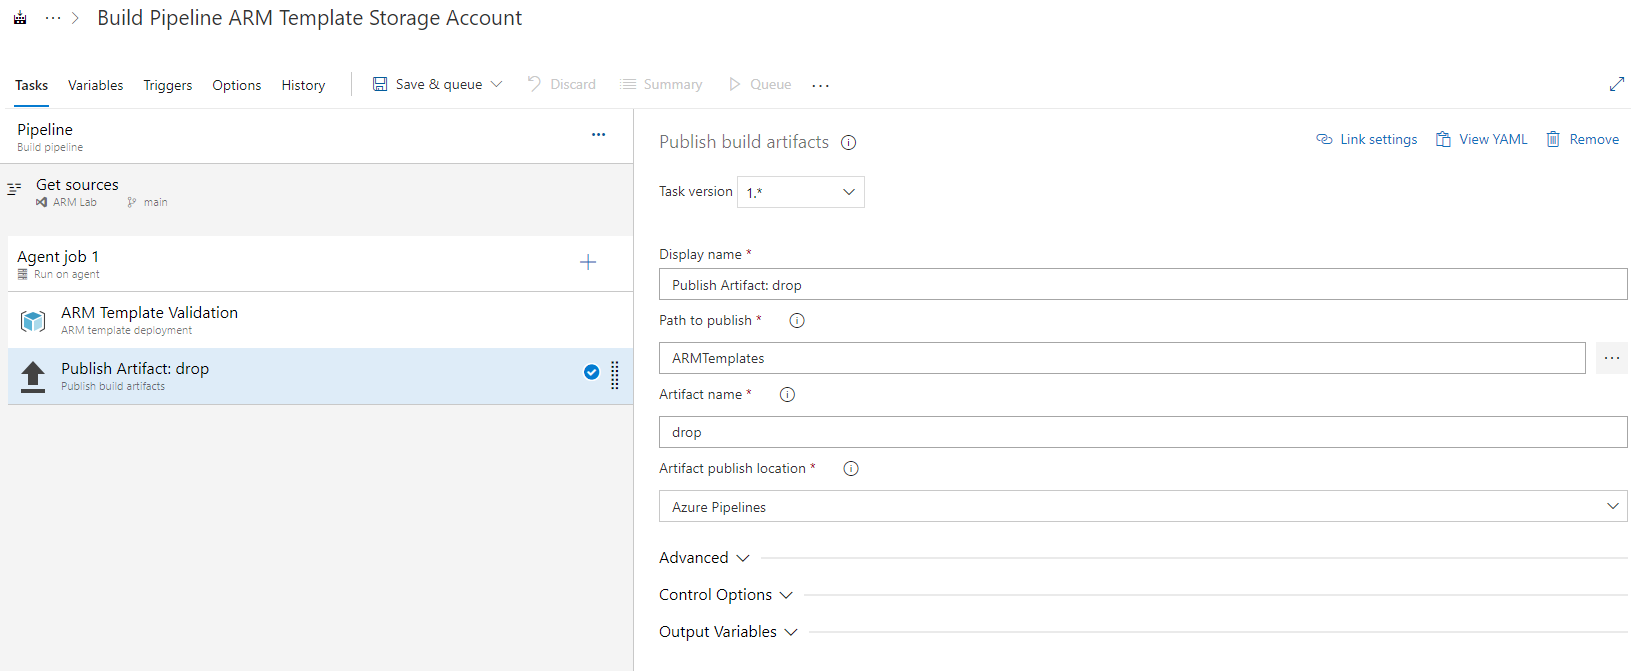
Configure the following:
- Path to publish: ARMTemplates
- Artifact name: drop
- Artifact publish location: Azure Pipelines
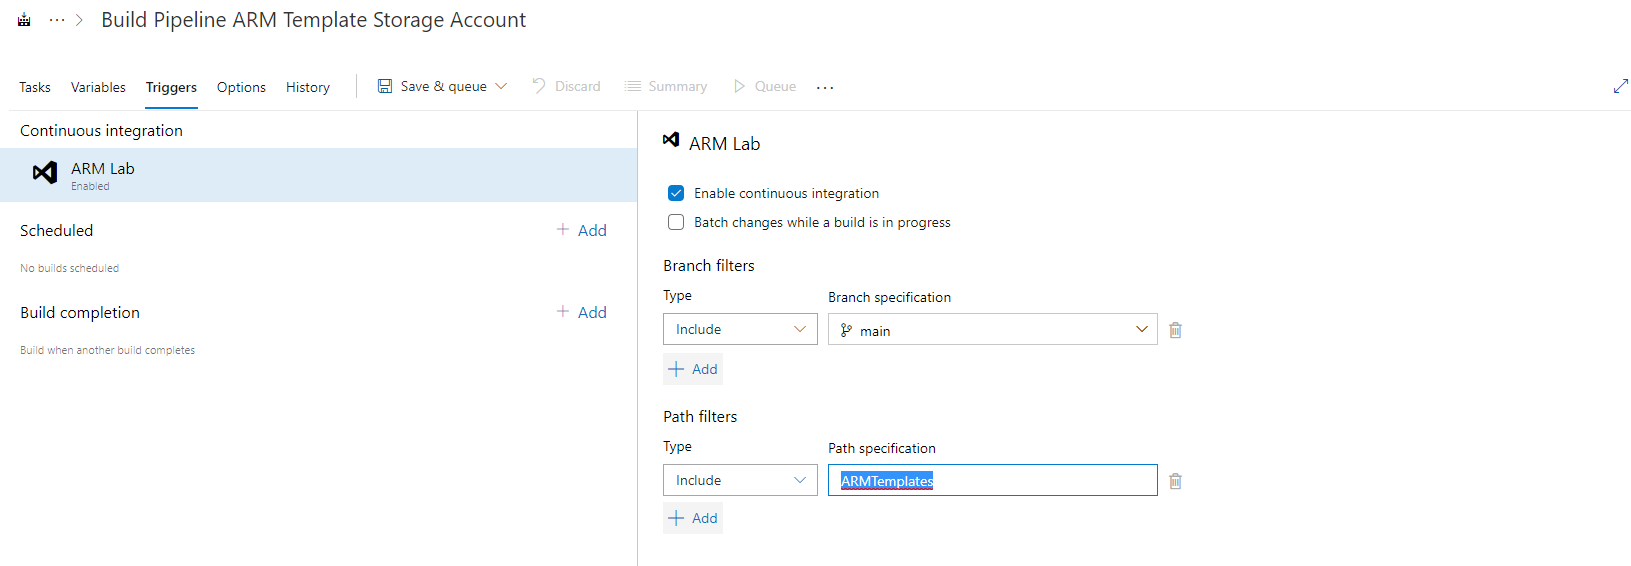
Navigate to the sub tab of “Triggers”.
Tick “Enable continuous integration”.
Add the “main” branch to the Branch filter.
Add “ARMTemplates” to the Path filer.
This will trigger our build pipeline to run every time where is a commit to the ARMTemplates folder in the main branch.
This is not enabled by default, but without this you are not working in a true Continuous Integration (CI) manner, and would have to manually run a build each time.
Each time the ARM template is amended, it will be automatically validated.
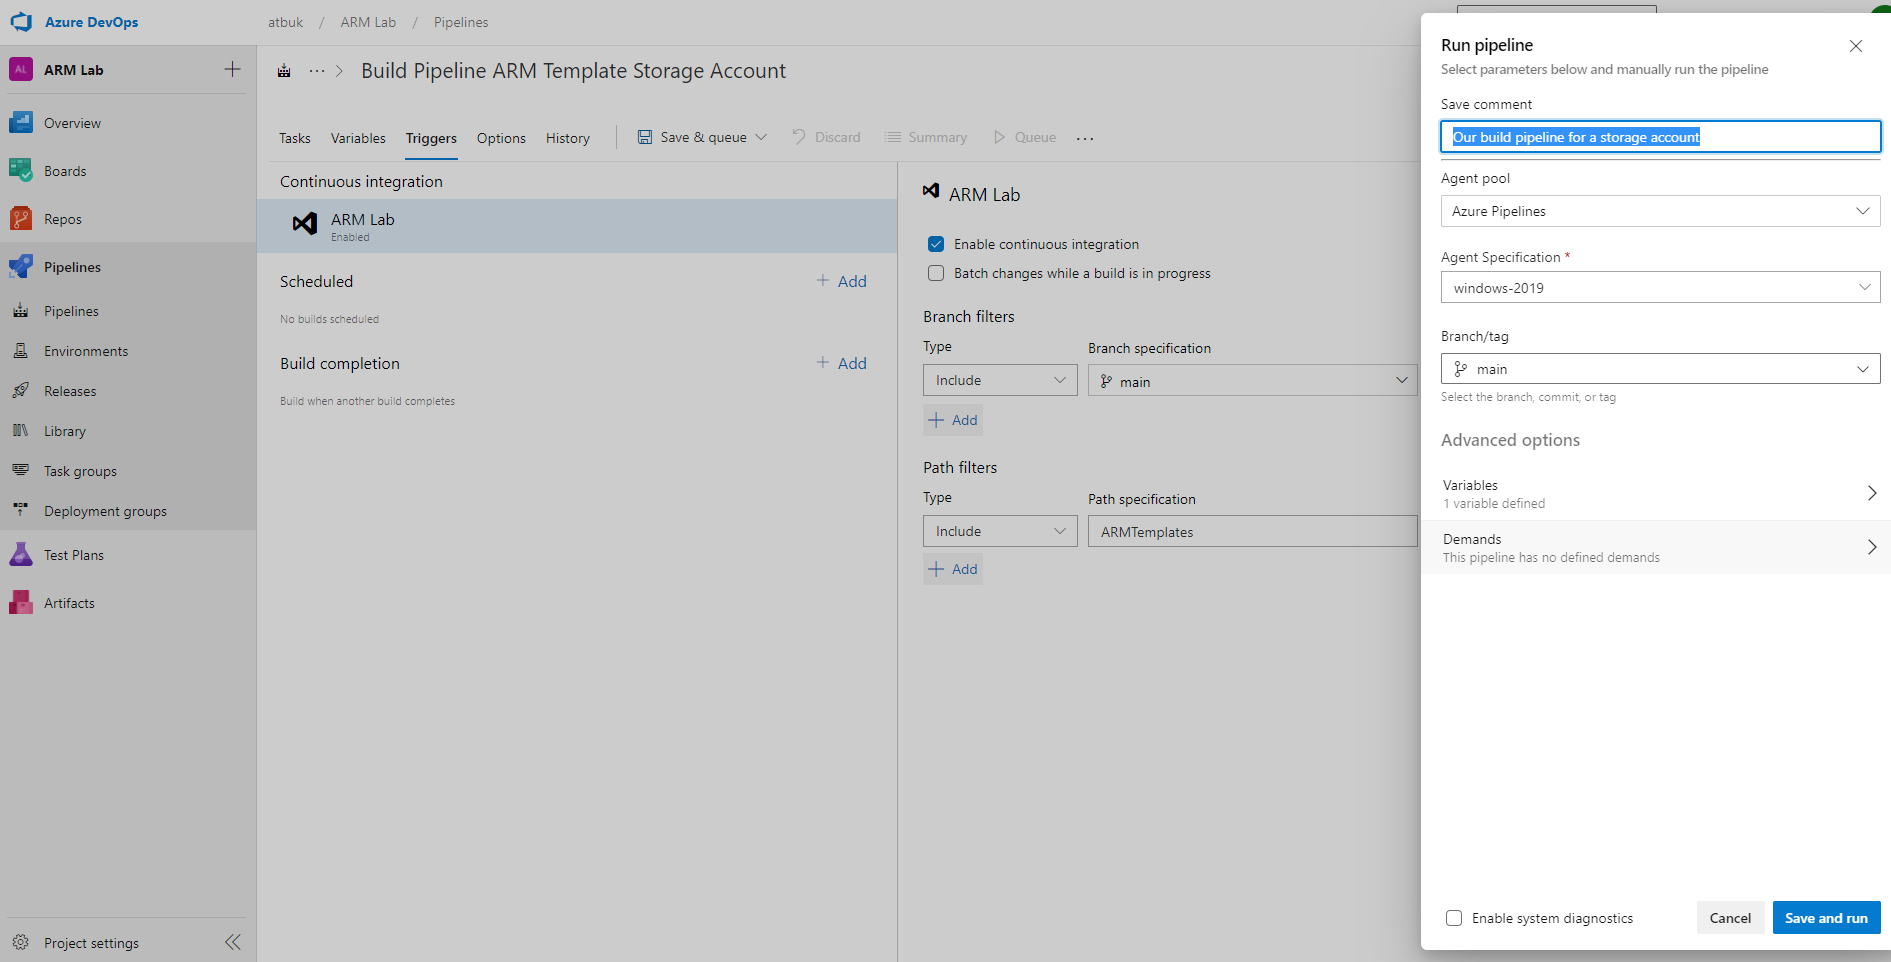
All that is left is to “Save & queue” our Build Pipeline using the button at the top.
Validate the agent settings and hit “Save and run”.
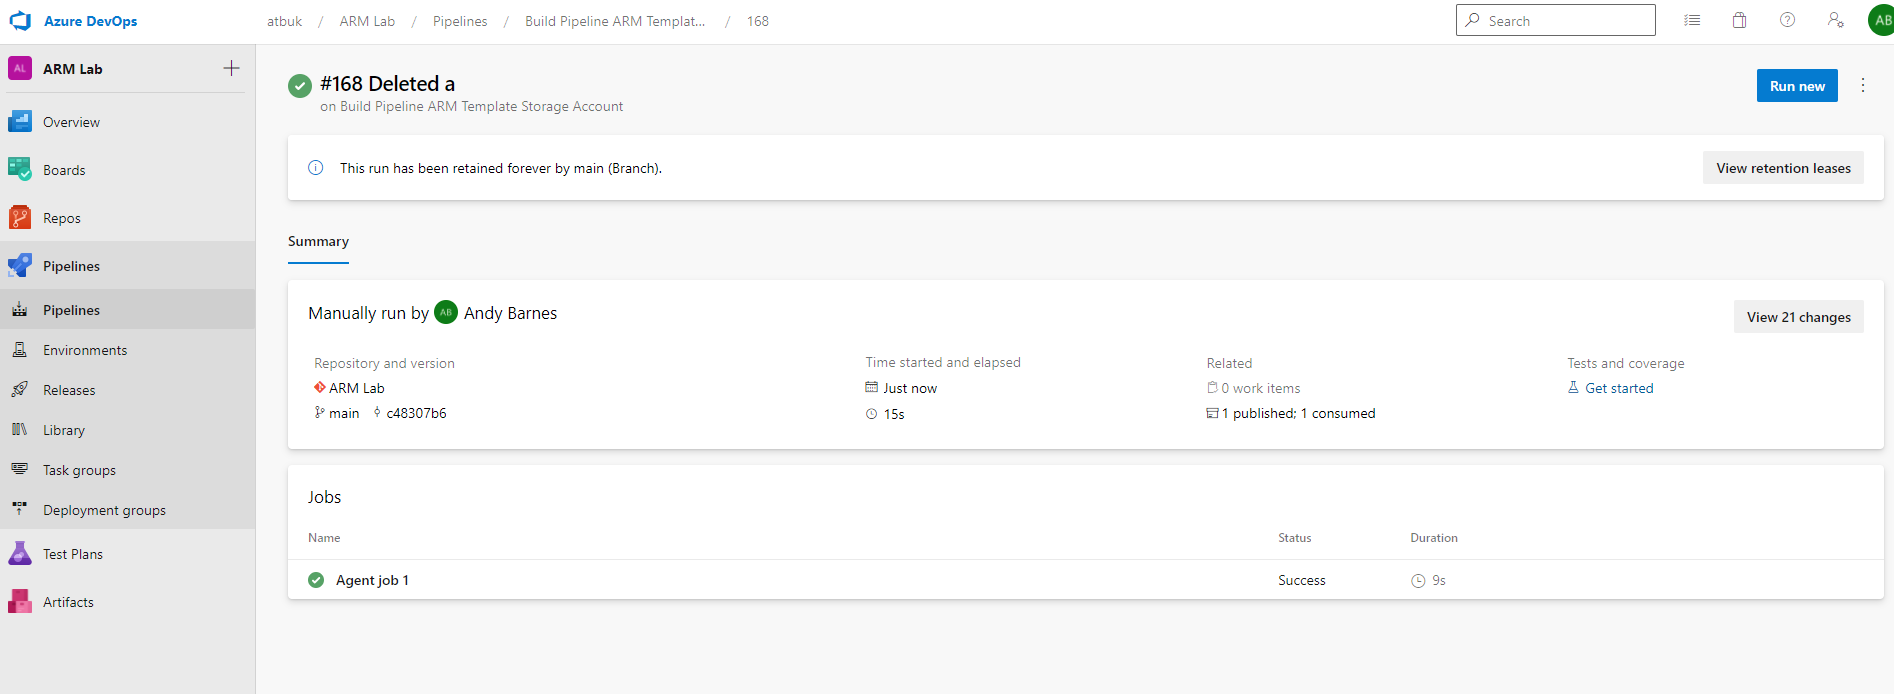
Select “Agent job 1” to see the status of the pipeline run.
The Status will reflect “Success” once all the tasks have completed without any issues.
You can review the logs of each task as it runs in realtime, including the code being checked out from our Azure Repo and the main branch using Git.
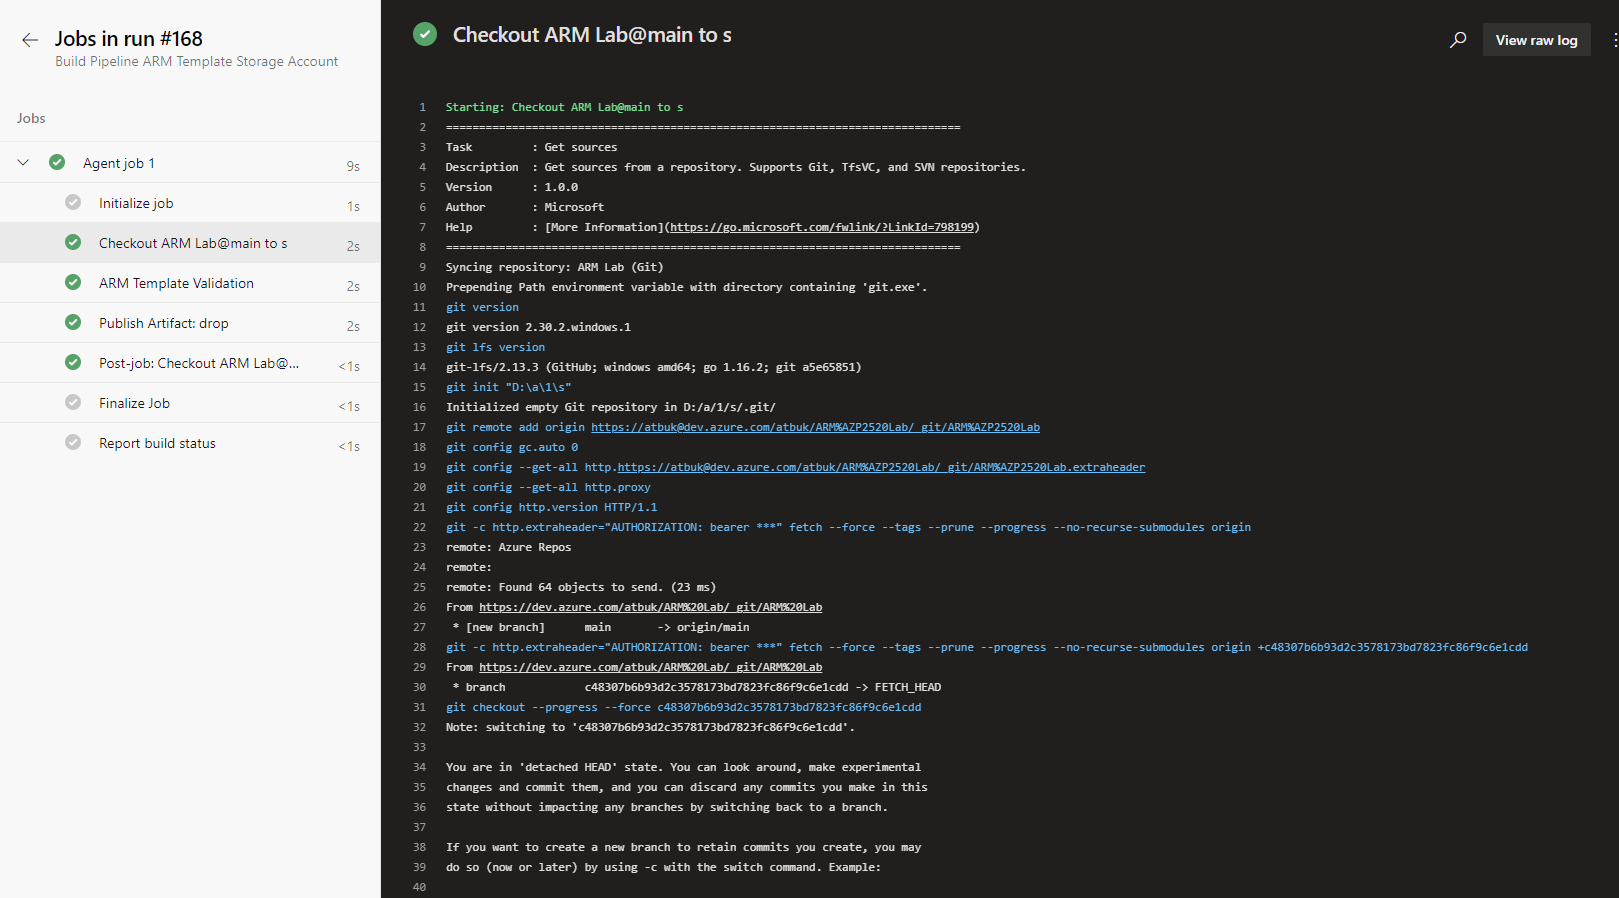
Next is our ARM template validation task which is successful.
Following the success of the validation (and only if that task is successful), an Artifact is created which will be used by a Release Pipeline later.
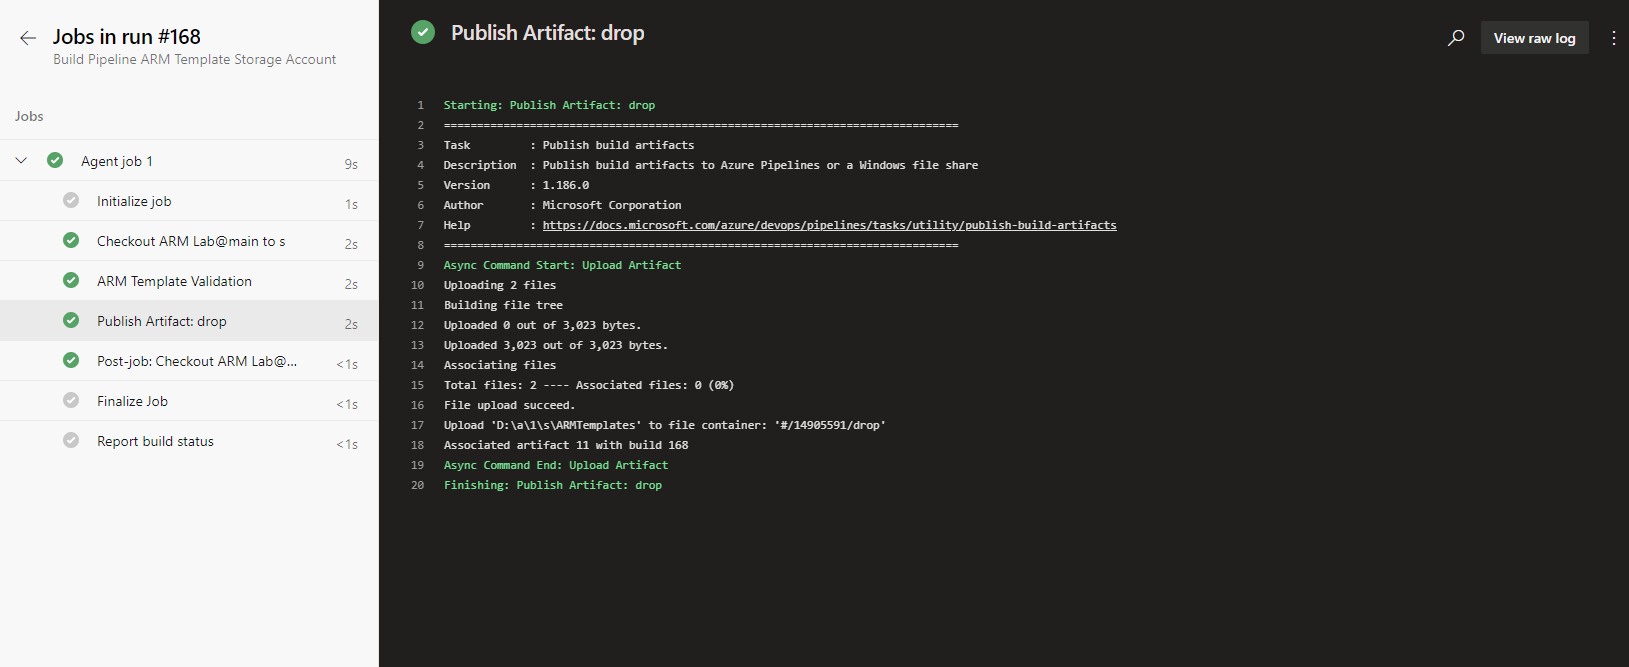
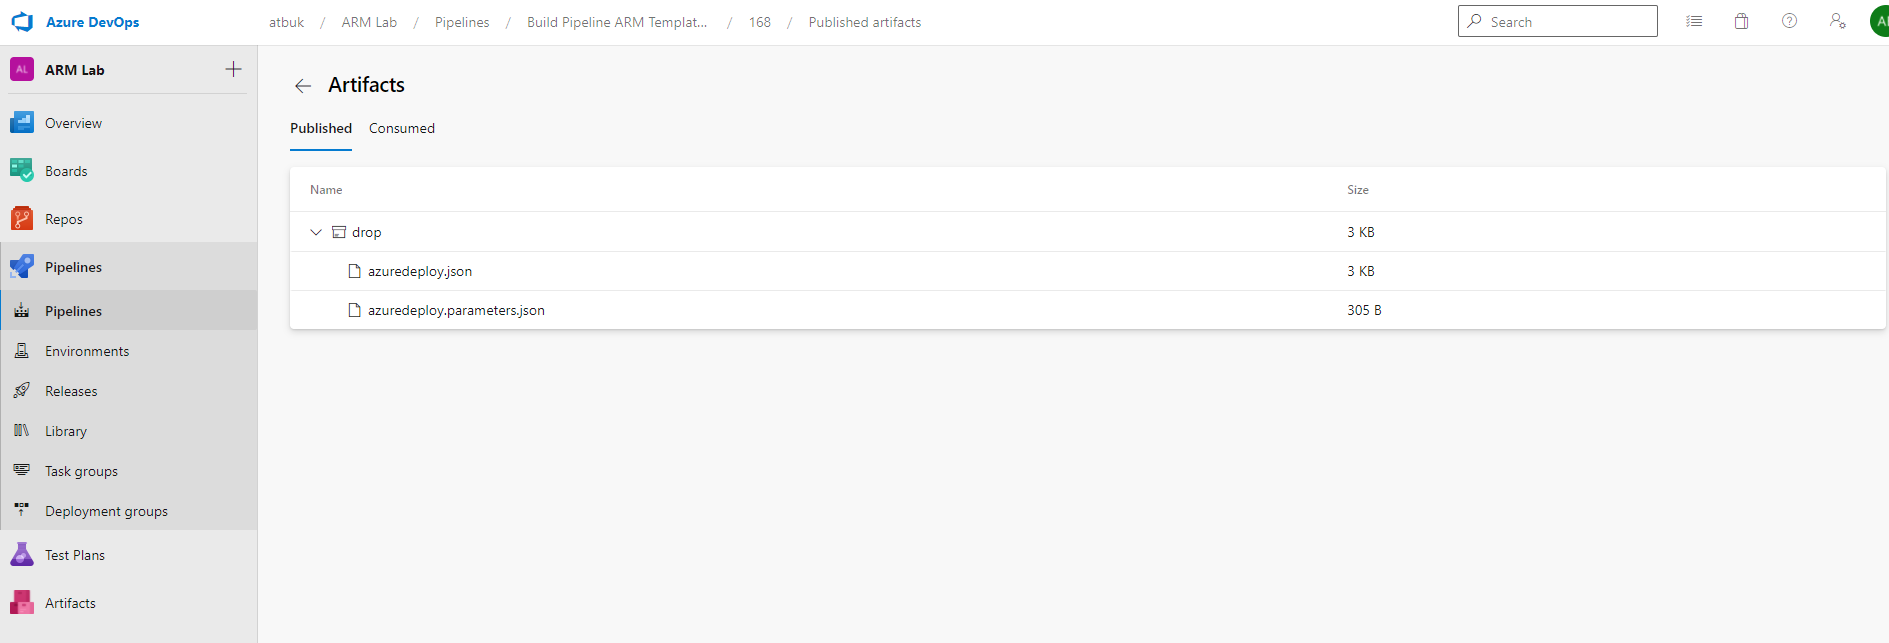
This Artifact can be viewed by clicking on the “1 published” link on the pipeline run summary page.
This will take you to the Artifact with a drop folder containing our azuredeploy.json and azuredeploy.parameters.json files.
To summarise what we have just done… We added our ARM template to an Azure Repo, created an ADO Build Pipeline (Classic), created a task to validate the ARM template, created a task to publish an Artifact ready to be consumed by a Release Pipeline.
Any commits to the ARMTemplate folder within the Repo will automatically trigger the Build Pipeline.
See here for the next step which is: Create an Azure DevOps Release Pipeline for ARM Template Deployment