When deploying ARM templates via Azure PowerShell/CLI or Azure DevOps pipelines, it is extremely useful to know what actions will be performed.
Sure creating a storage account is simple to understand the outcome, but in a complicated existing environment knowing what resources will be added, modified or removed is very important to validate.
Microsoft added a new What-If option to the Azure PowerShell and Azure CLI modules, which outputs exactly what changes it will make, so you can confirm the actions before running the deployment.
This is very similar to a Terraform “Plan” which will validate which resources will be added, modified or destroyed and helps identify any obvious configuration issues or dependencies before a Terraform “Apply” aka deployment.
For information on What-If can be found here on MS Docs: ARM template deployment what-if operation – https://docs.microsoft.com/en-us/azure/azure-resource-manager/templates/deploy-what-if?tabs=azure-powershell
Its great being able to run a What-If on the command line, but what if you’re using Azure DevOps pipelines to deploy ARM Templates? Can you make use of this?
Well the good news is a What-If task can be added to your pipeline and its also simple to do so.
My preference is to add a What-If task in two places; the build pipeline to validate the ARM template is going to do what I expect; and also the release pipeline just as a simple additional bit of pipeline logging so I can see what the ARM template as going to do right before the deploy task runs.
Below I will detail how to add a What-If task to both an existing Build Pipeline (Classic) and a Release Pipeline.
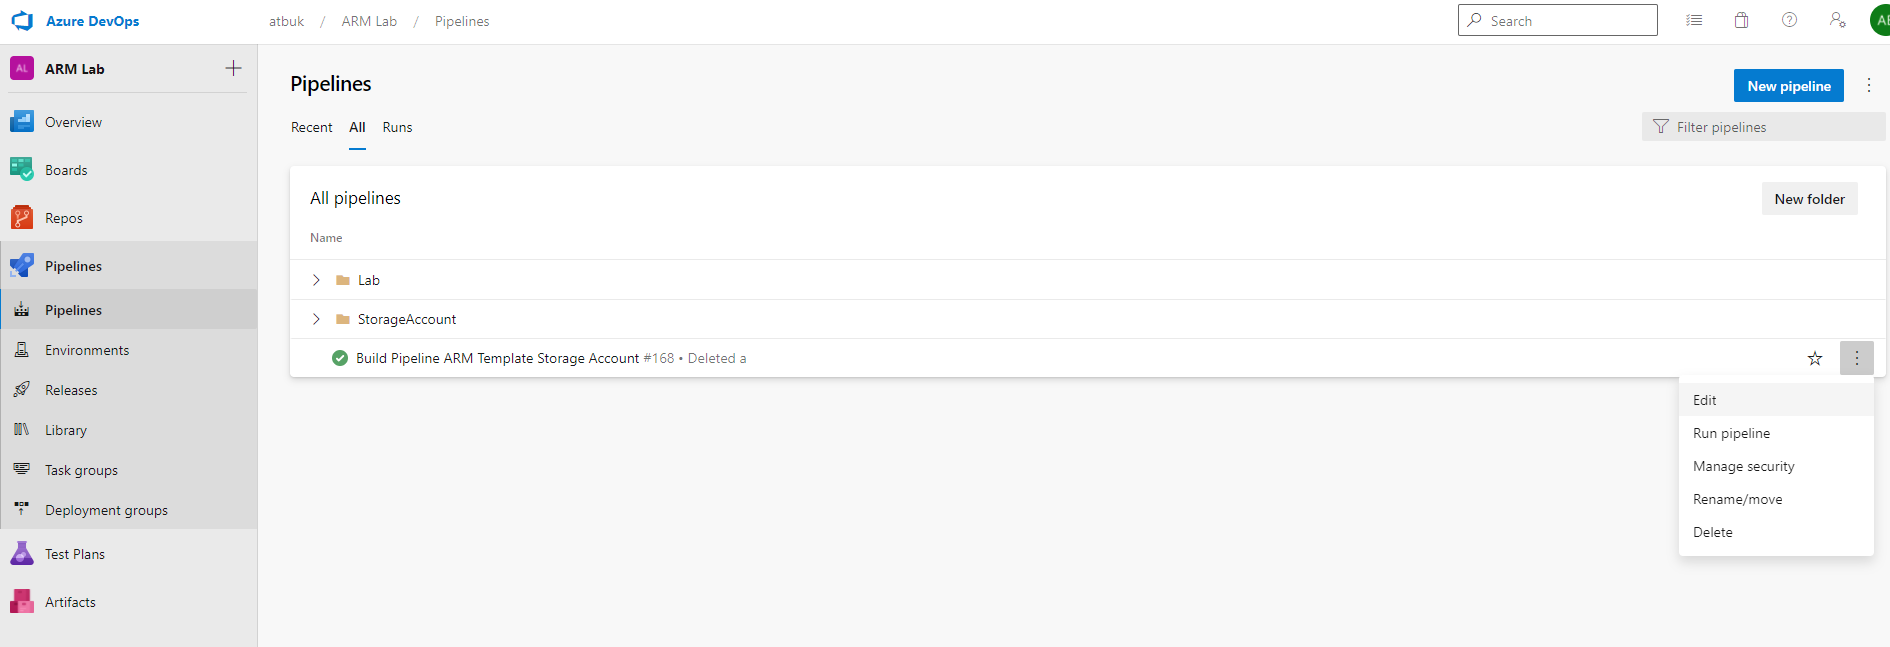
Build Pipeline (Classic)
Navigate to your existing Build Pipeline and select “Edit”.
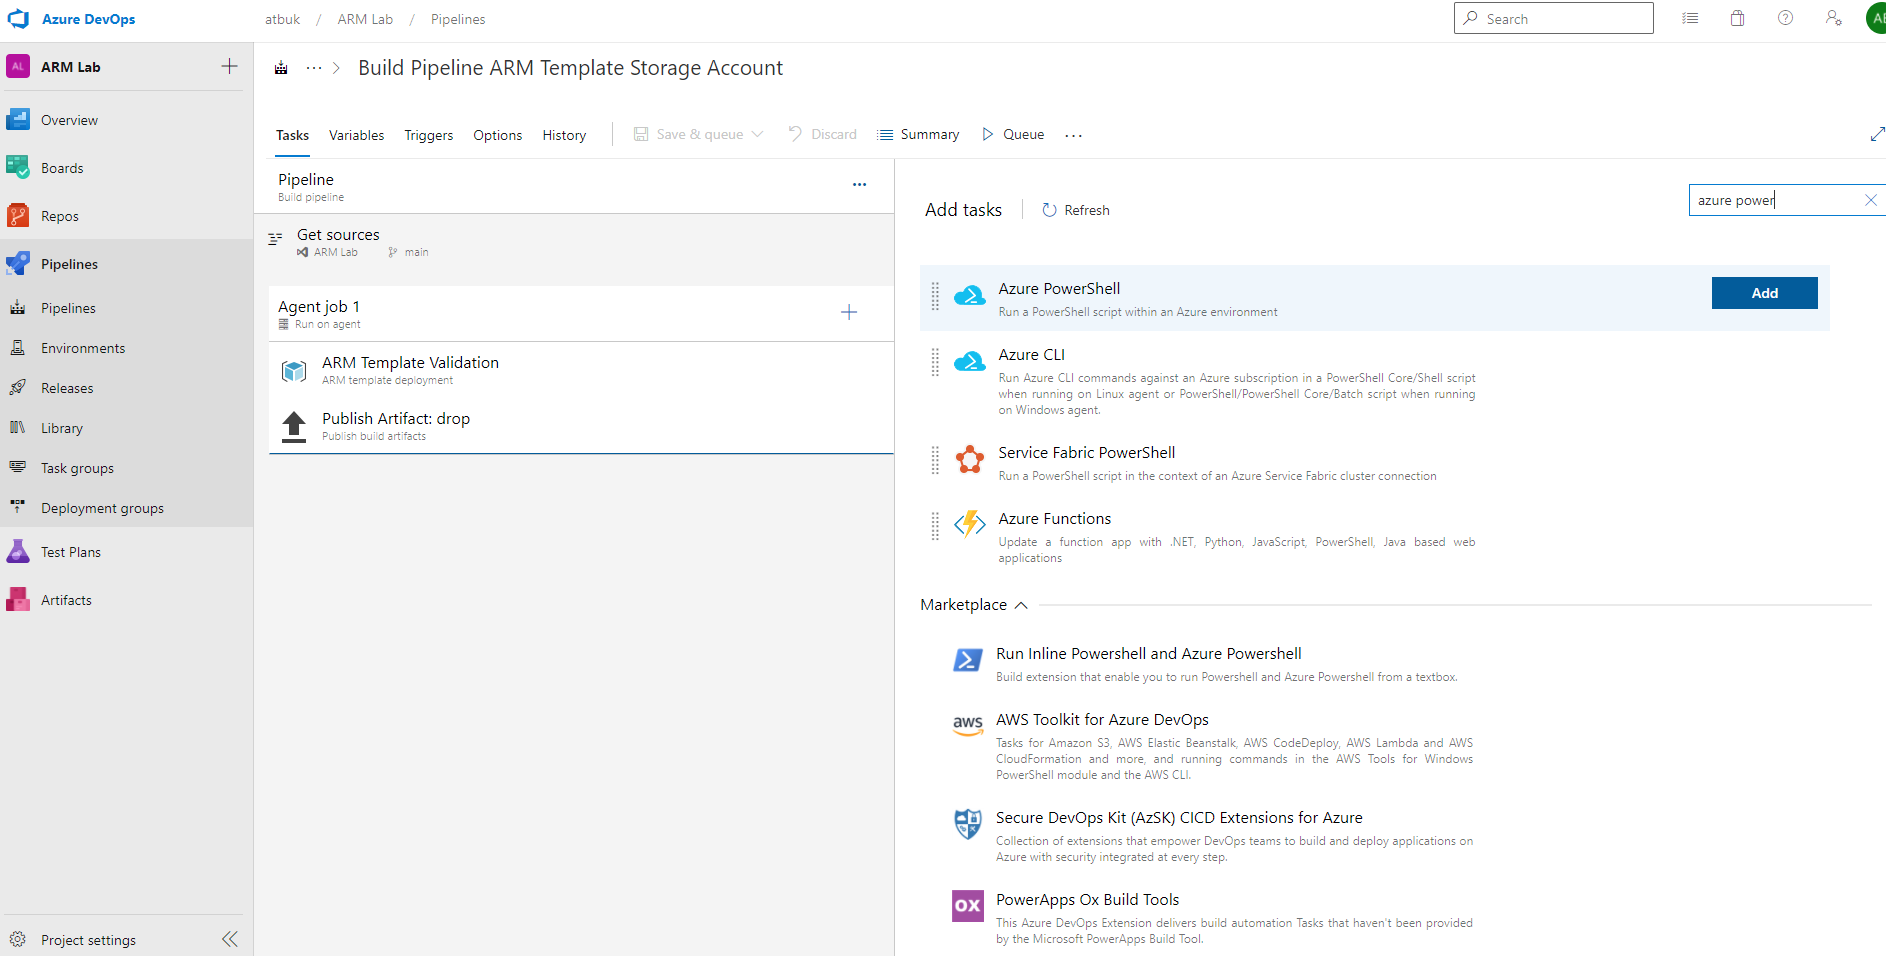
Add a task to the Agent job by clicking “+”.
Select “Azure PowerShell” and click “Add”.
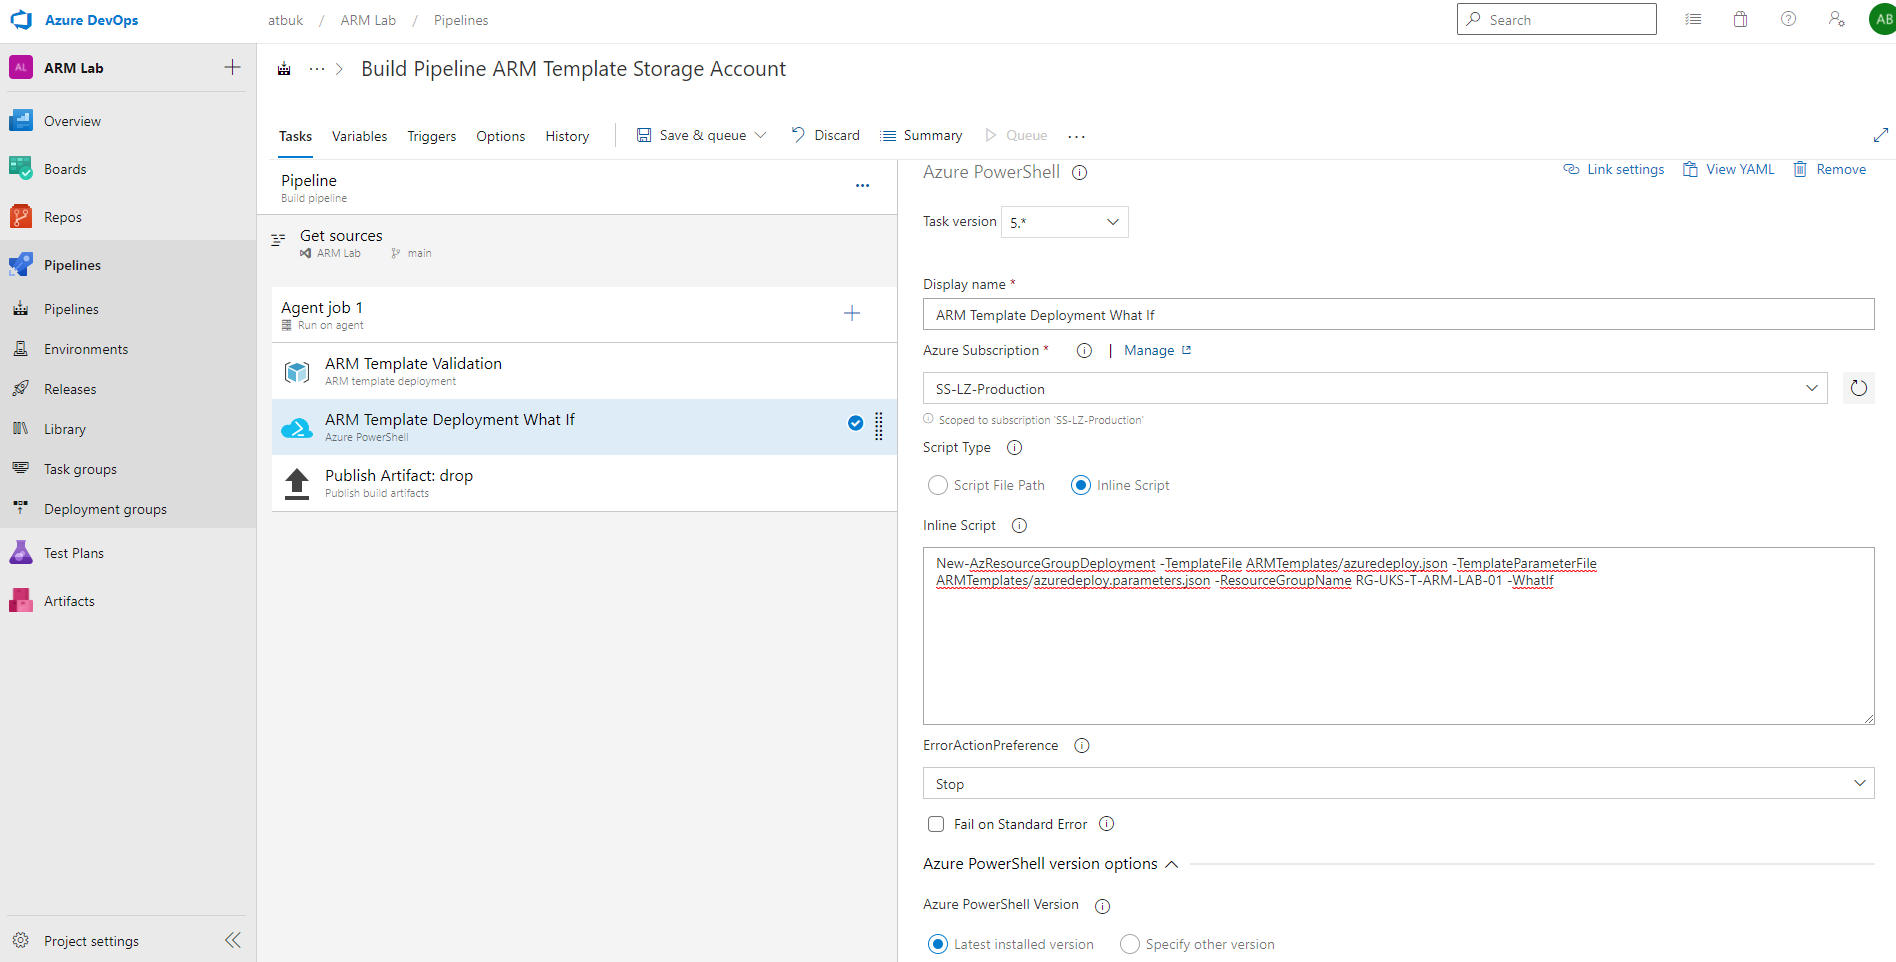
Give the task a name of “ARM Template Deployment What-If”.
Select your Subscription.
Select “Inline Script” and the Script type.
For Azure PowerShell version, select “Latest installed version”.
Enter the following inline script amending as appropriate for your template file, parameter file and resource group:
New-AzResourceGroupDeployment -TemplateFile ARMTemplates/azuredeploy.json -TemplateParameterFile ARMTemplates/azuredeploy.parameters.json -ResourceGroupName "RG-UKS-T-ARM-LAB-01" -WhatIf
Click “Save & queue” to run the Build Pipeline.
Enter a comment if desired then click “Save & run”.

The job will be queued onto an agent.

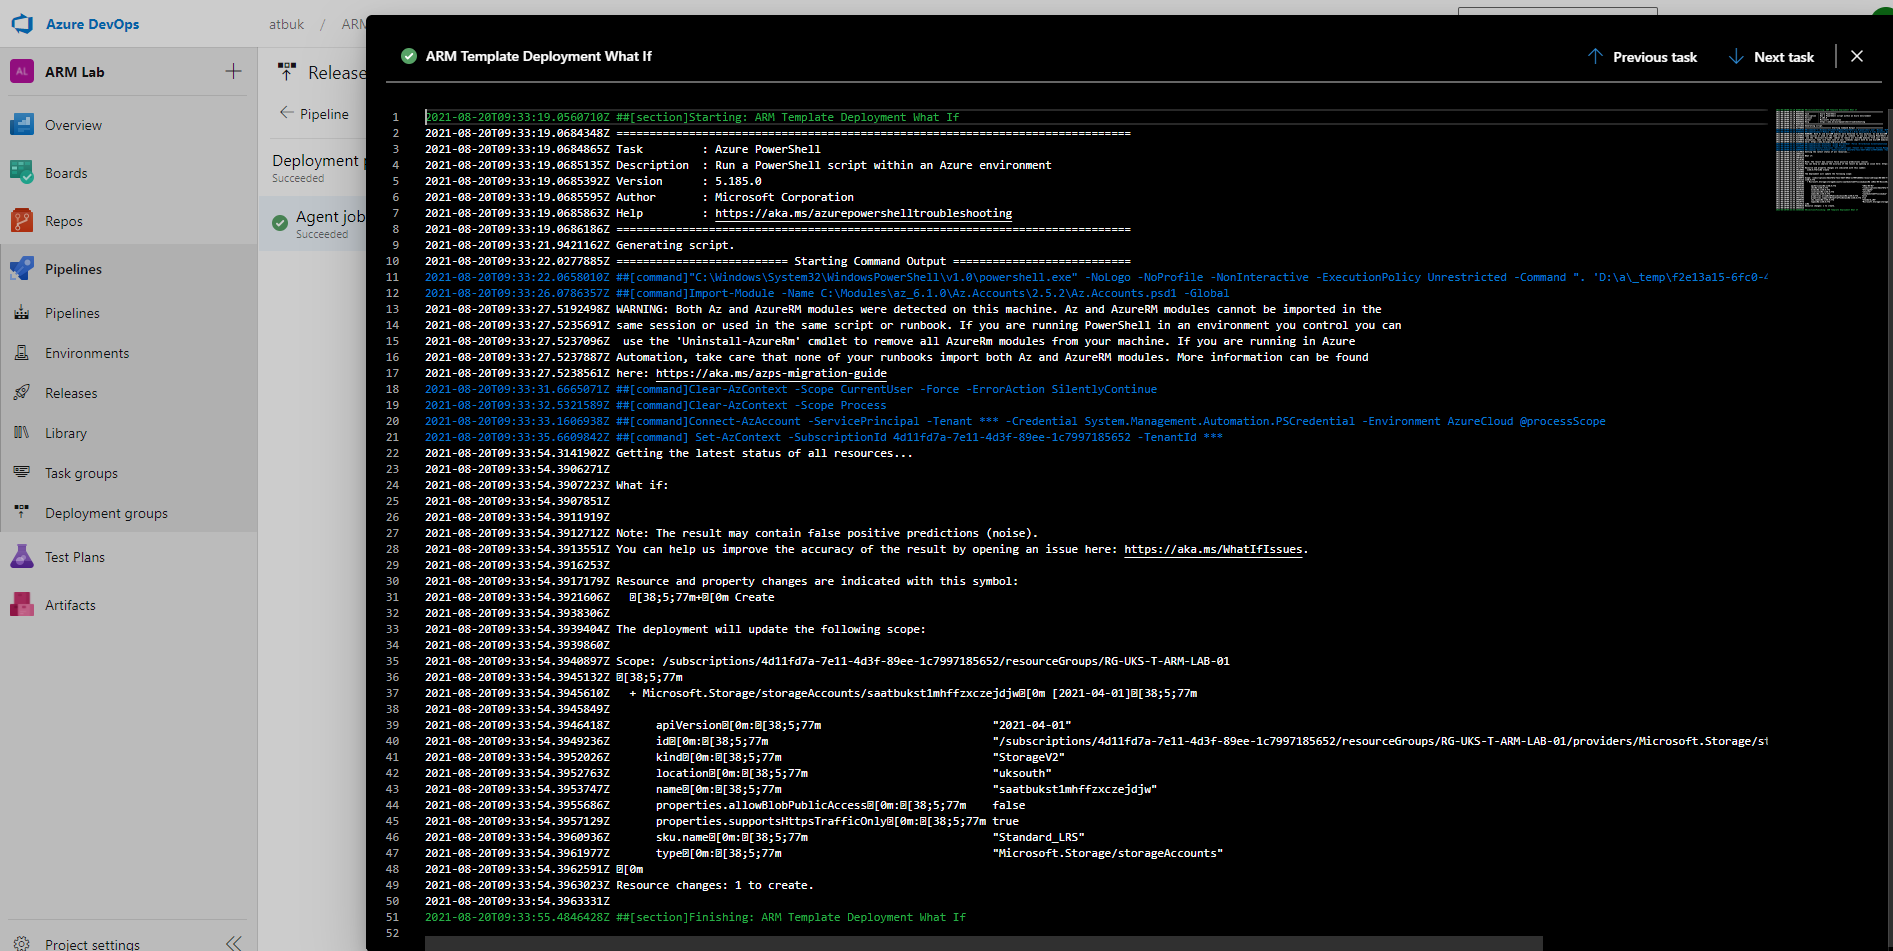
As the tasks in the Build Pipeline run though, it will get to the What-If Azure PowerShell task and output exactly what Create, Modify and Delete actions will be performed based on the template, parameters and resource group provided.
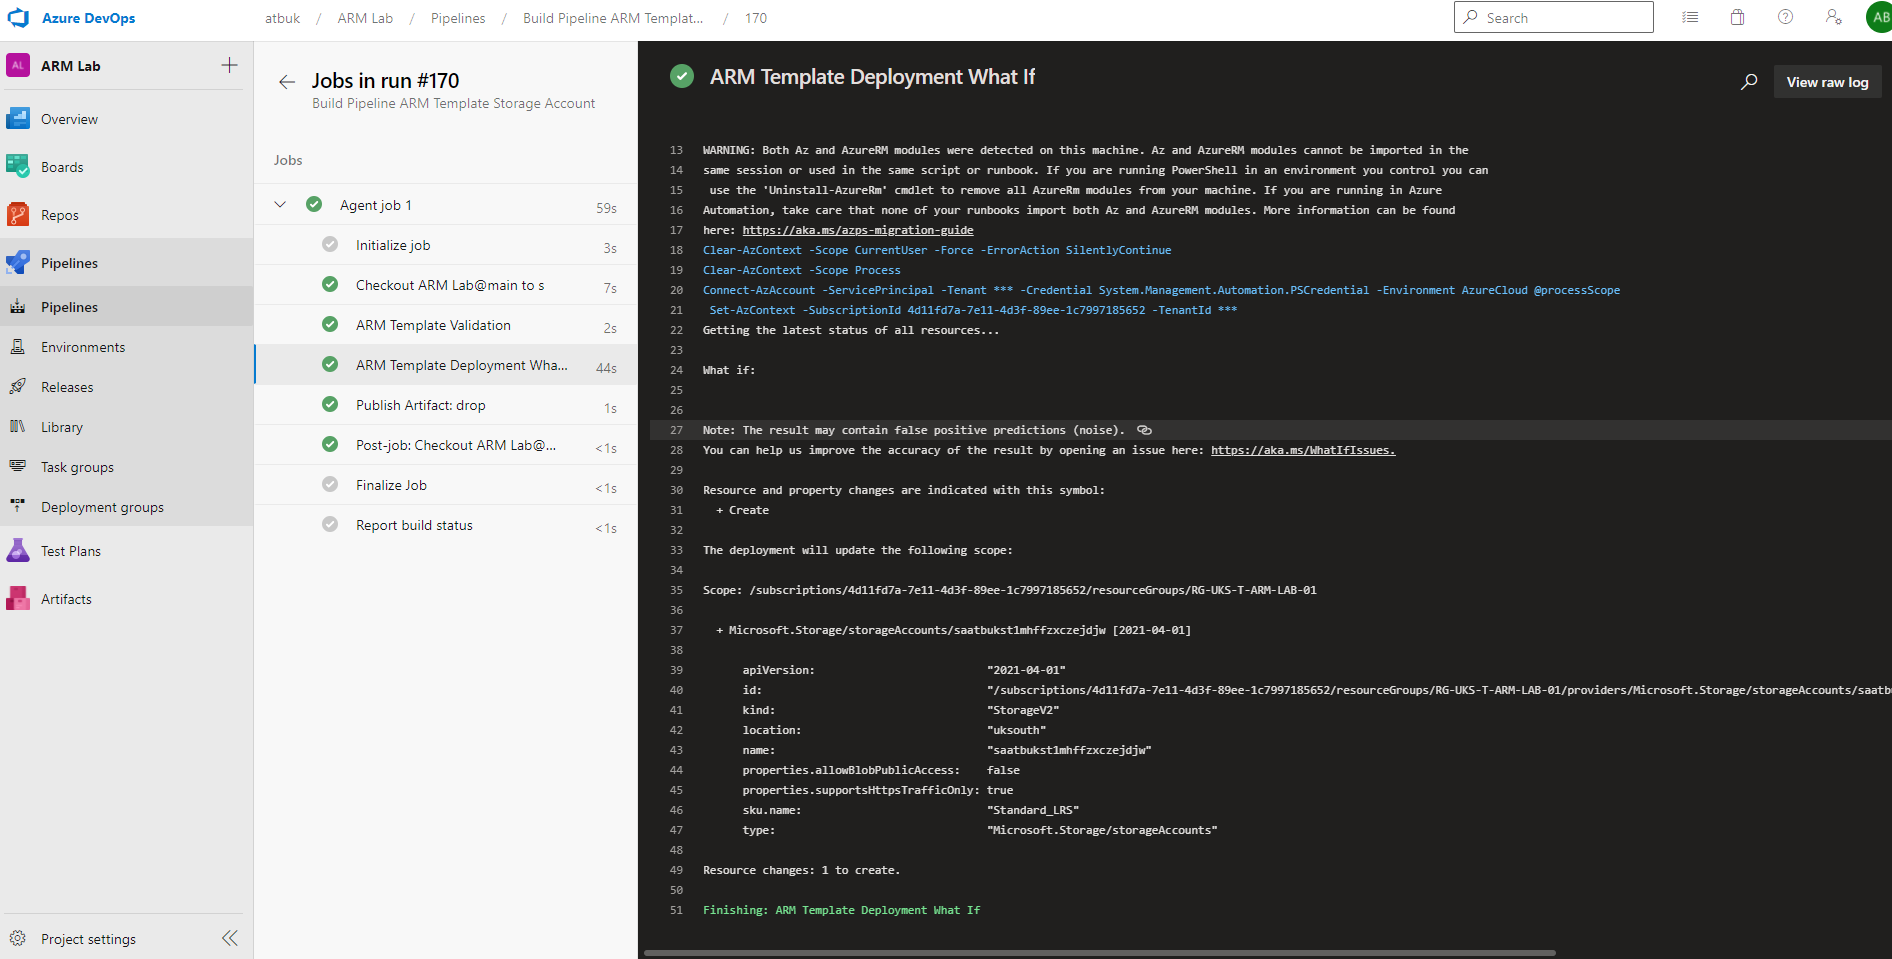
In this case it will be creating a new storage account with the properties listed.
Another example could be modifying a storage account from LRS to GRS, the SKU of the storage account would show as a modification.
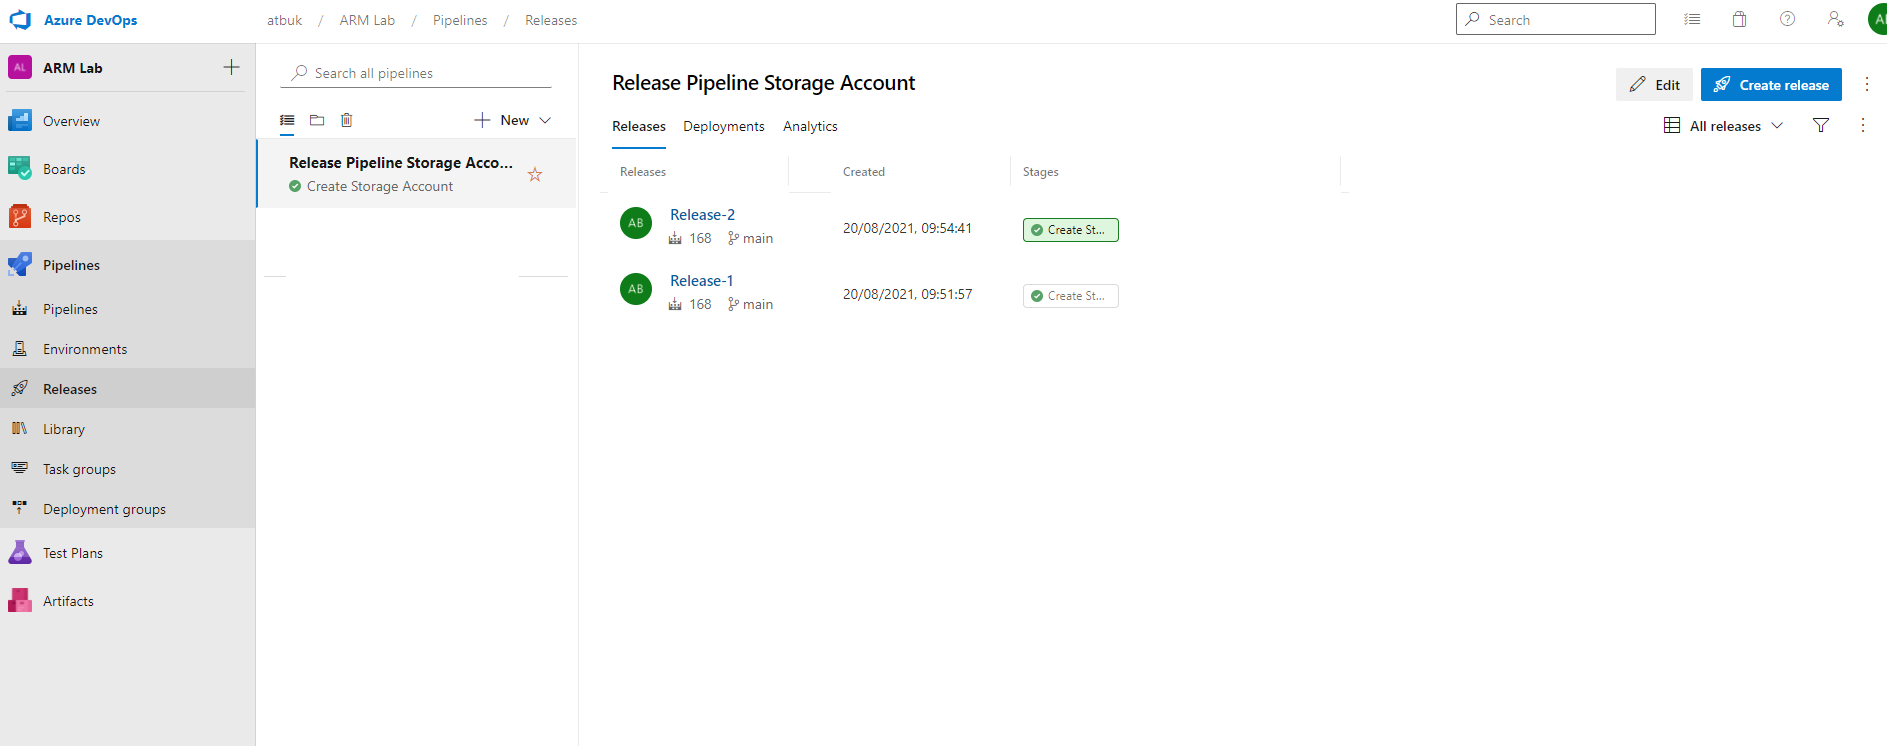
Release Pipeline
Navigate to your existing Release Pipeline and select “Edit”.
Select your desired stage which performs an ARM Template deployment.

Add a task to the Agent job by clicking “+”.
Select “Azure PowerShell” and click “Add”.

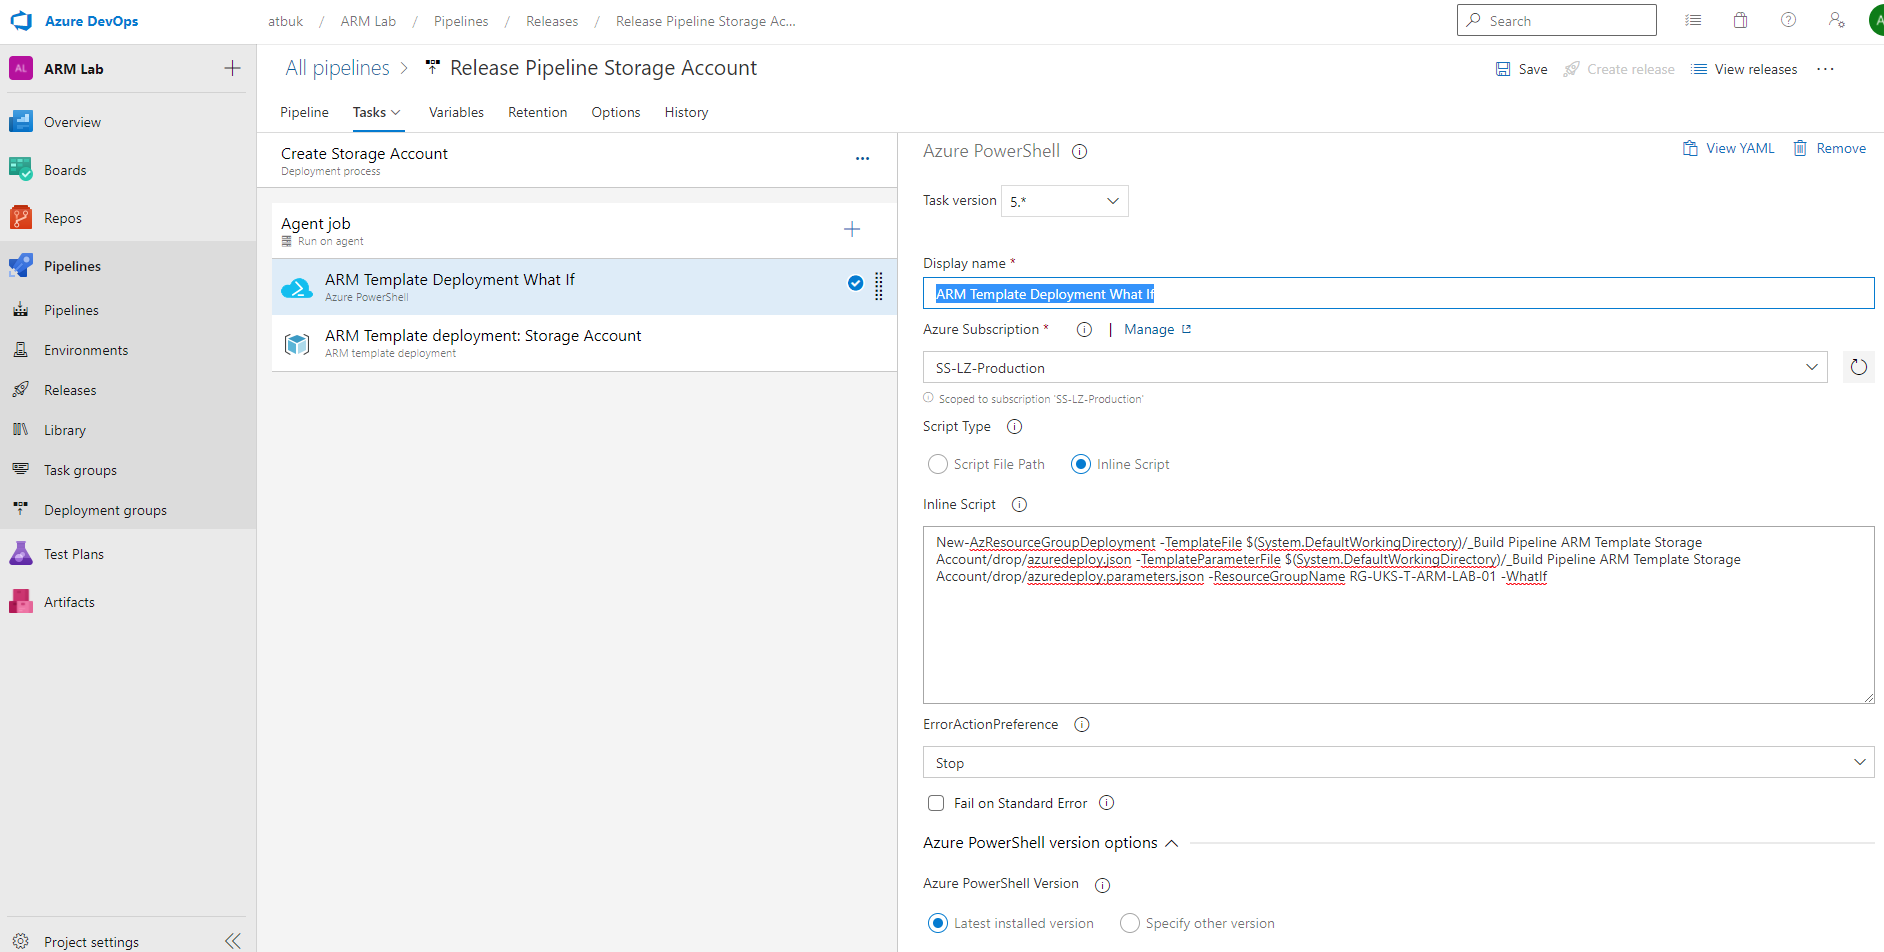
Give the task a name of “ARM Template Deployment What-If”.
Select your Subscription.
Select “Inline Script” and the Script type.
For Azure PowerShell version, select “Latest installed version”.
Enter the following inline script amending as appropriate for your template file, parameter file and resource group:
New-AzResourceGroupDeployment -TemplateFile "$(System.DefaultWorkingDirectory)/_Build Pipeline ARM Template Storage Account/drop/azuredeploy.json" -TemplateParameterFile "$(System.DefaultWorkingDirectory)/_Build Pipeline ARM Template Storage Account/drop/azuredeploy.parameters.json" -ResourceGroupName "RG-UKS-T-ARM-LAB-01" -storageName $(storageName) -environment $(environment) -WhatIf
Click Save.
Click “Create Release” and “Create” again.
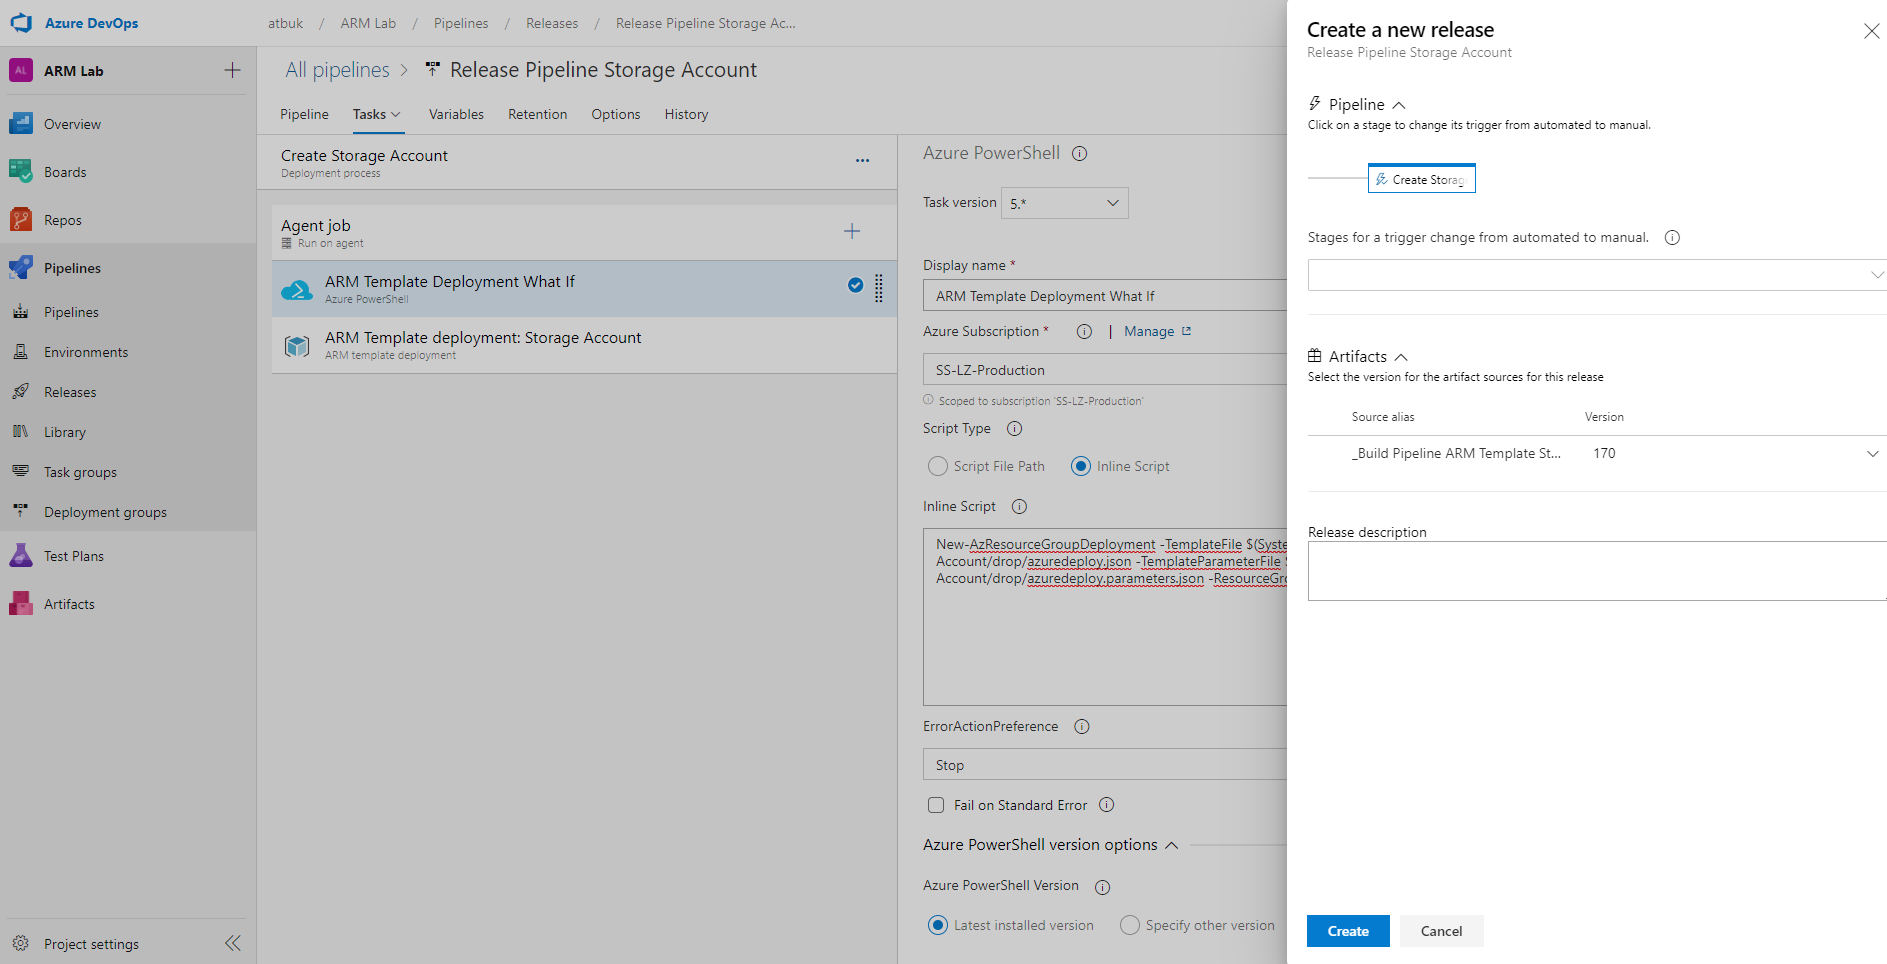
Depending on your Pipeline trigger settings, it will either automatically trigger a run after the release (as in my case) or you will need to trigger it manually.
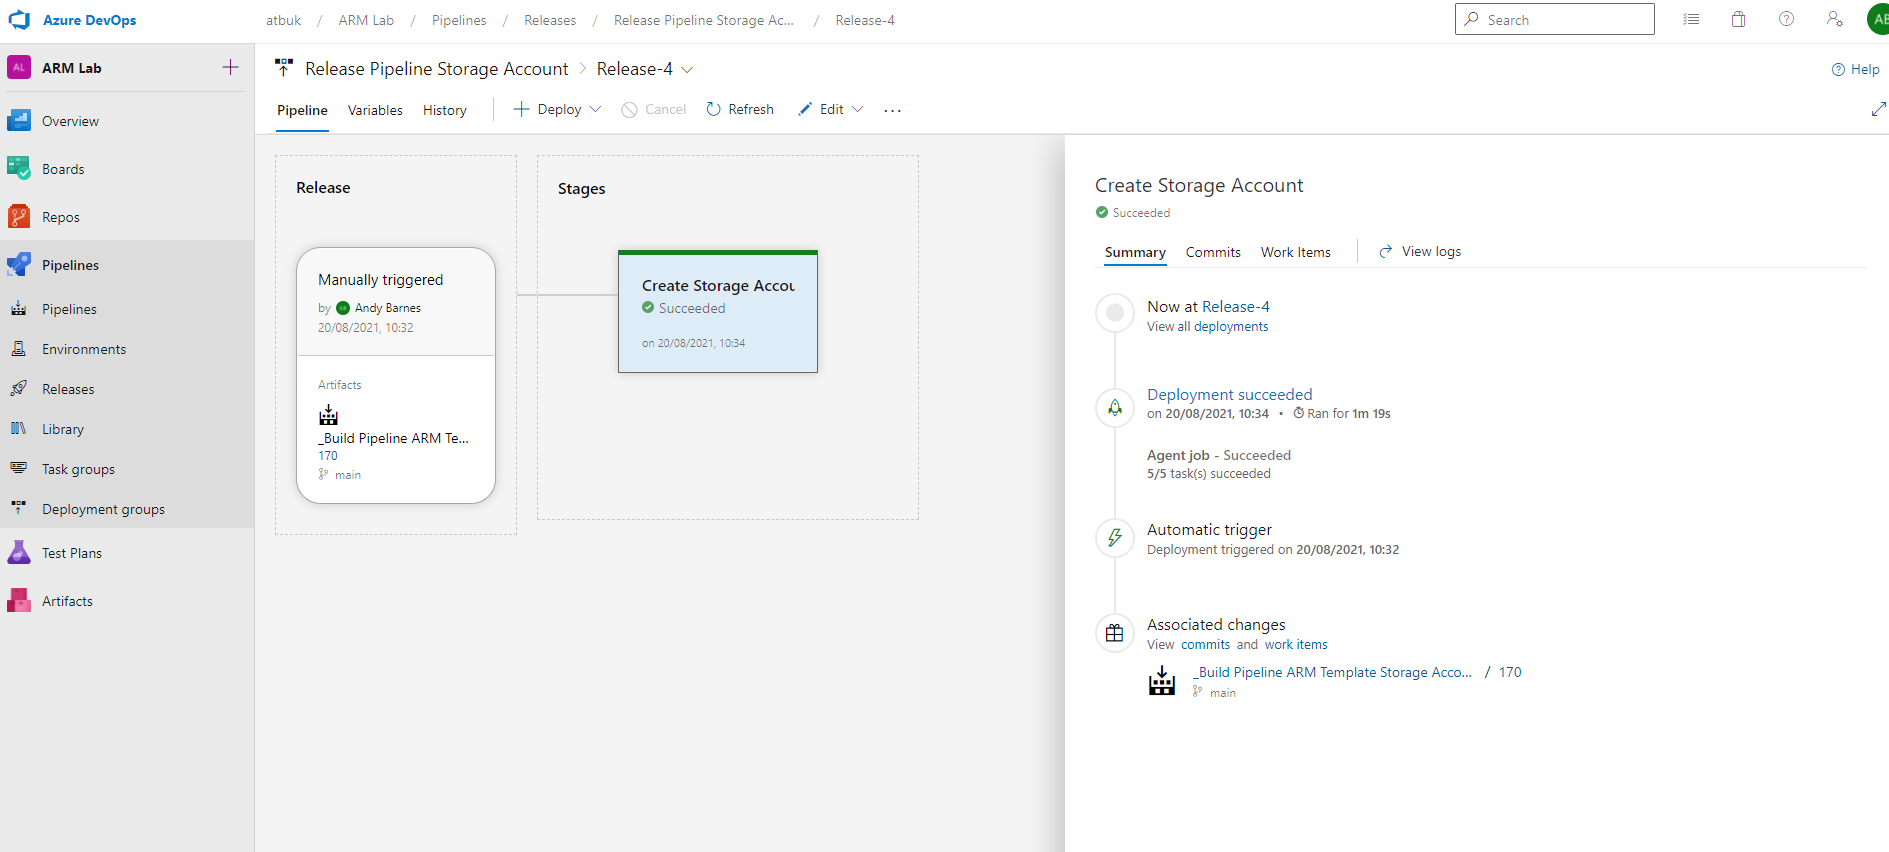
You will see the new Release and the stage beginning to run.
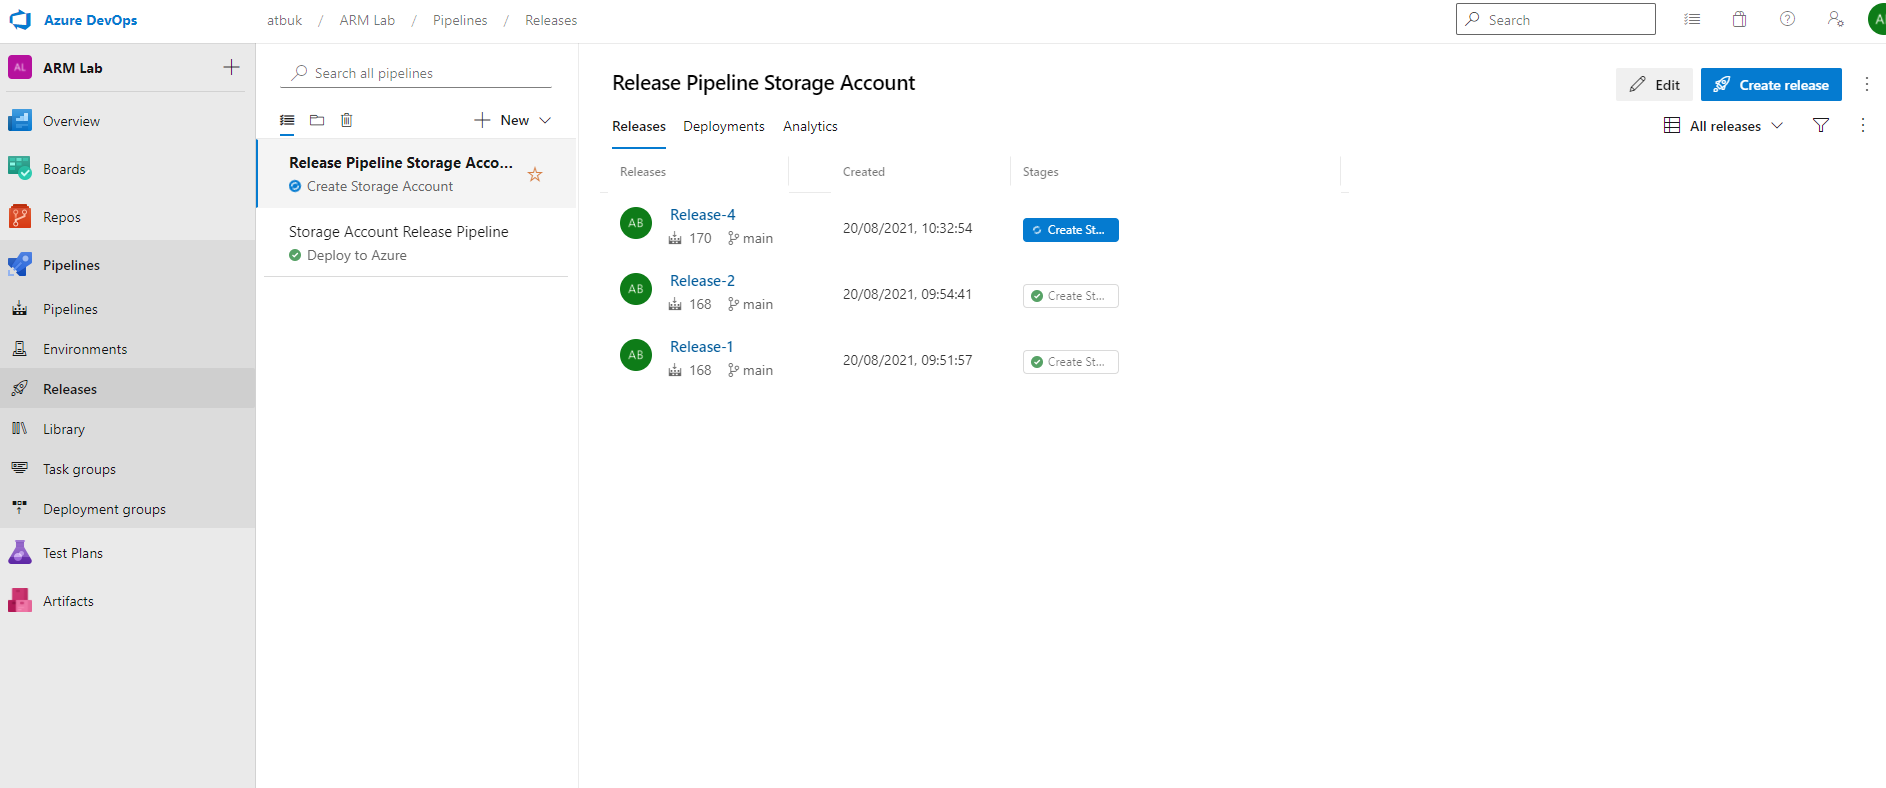
The job will be queued on an agent and the tasks run.
As mentioned earlier, I like to add a What-If task to a Release pipeline simply to add further logging of exactly what is being deployed in the next task because it can make troubleshooting easier.
If you view the log for the “ARM Template Deployment What-If” task, the output of what will be added, modified or deleted is displayed. In this case it is simply creating a new storage account.
Hopefully this helps you utilise the power and usefulness of What-If in Azure DevOps pipelines.